---
title: "Create Drill-Down Links to Application Pages"
slug: "apex20drilldownlinksenduserguide"
status: "new"
updated: 2026-11-02T04:46:37Z
published: 2026-11-02T04:46:37Z
canonical: "help.symphonysummitai.com/apex20drilldownlinksenduserguide"
---
> ## Documentation Index
> Fetch the complete documentation index at: https://help.symphonysummitai.com/llms.txt
> Use this file to discover all available pages before exploring further.
# Create Drill-Down Links to Application Pages
You can add clickable links to report columns in **Apex 2.0** Reporting to open the corresponding record in the Apex application. **For example**; users can select an incident number in a report to open that incident's details page.
You can configure drill-down links in either of these ways:
- Create a virtual dataset in SQL Lab that includes a hyperlink column.
- Add custom SQL directly to a report column.
#### Before you begin
- Make sure you can access Apex 2.0 Reporting and the target Apex application environment.
- Identify the customer environment's base URL and the target record details page.
- Identify the encrypted record ID field in the corresponding mart table.
- Make sure you have permission to create or edit the required dataset or report.
> [!NOTE]
> Note
>
> The URLs in this guide are examples. Replace the sample host name with the URL for your customer environment
## Create a Virtual Dataset with Drill-down Links
Use this method when you want to create a reusable dataset that contains clickable links to application records.
****Step 1 - Identify the customer URL****
Identify the base URL for the customer environment. **Example**: https://xxxxxnity.xxxaiapexxx.com/
****Step 2 - Get the target record page URL****
To get the target record page url, perform the following steps:
1. Log in to the **Apex** application.
2. Navigate to **Incident** > **Manage incidents** > **Incident List**. The Incident List page is displayed. 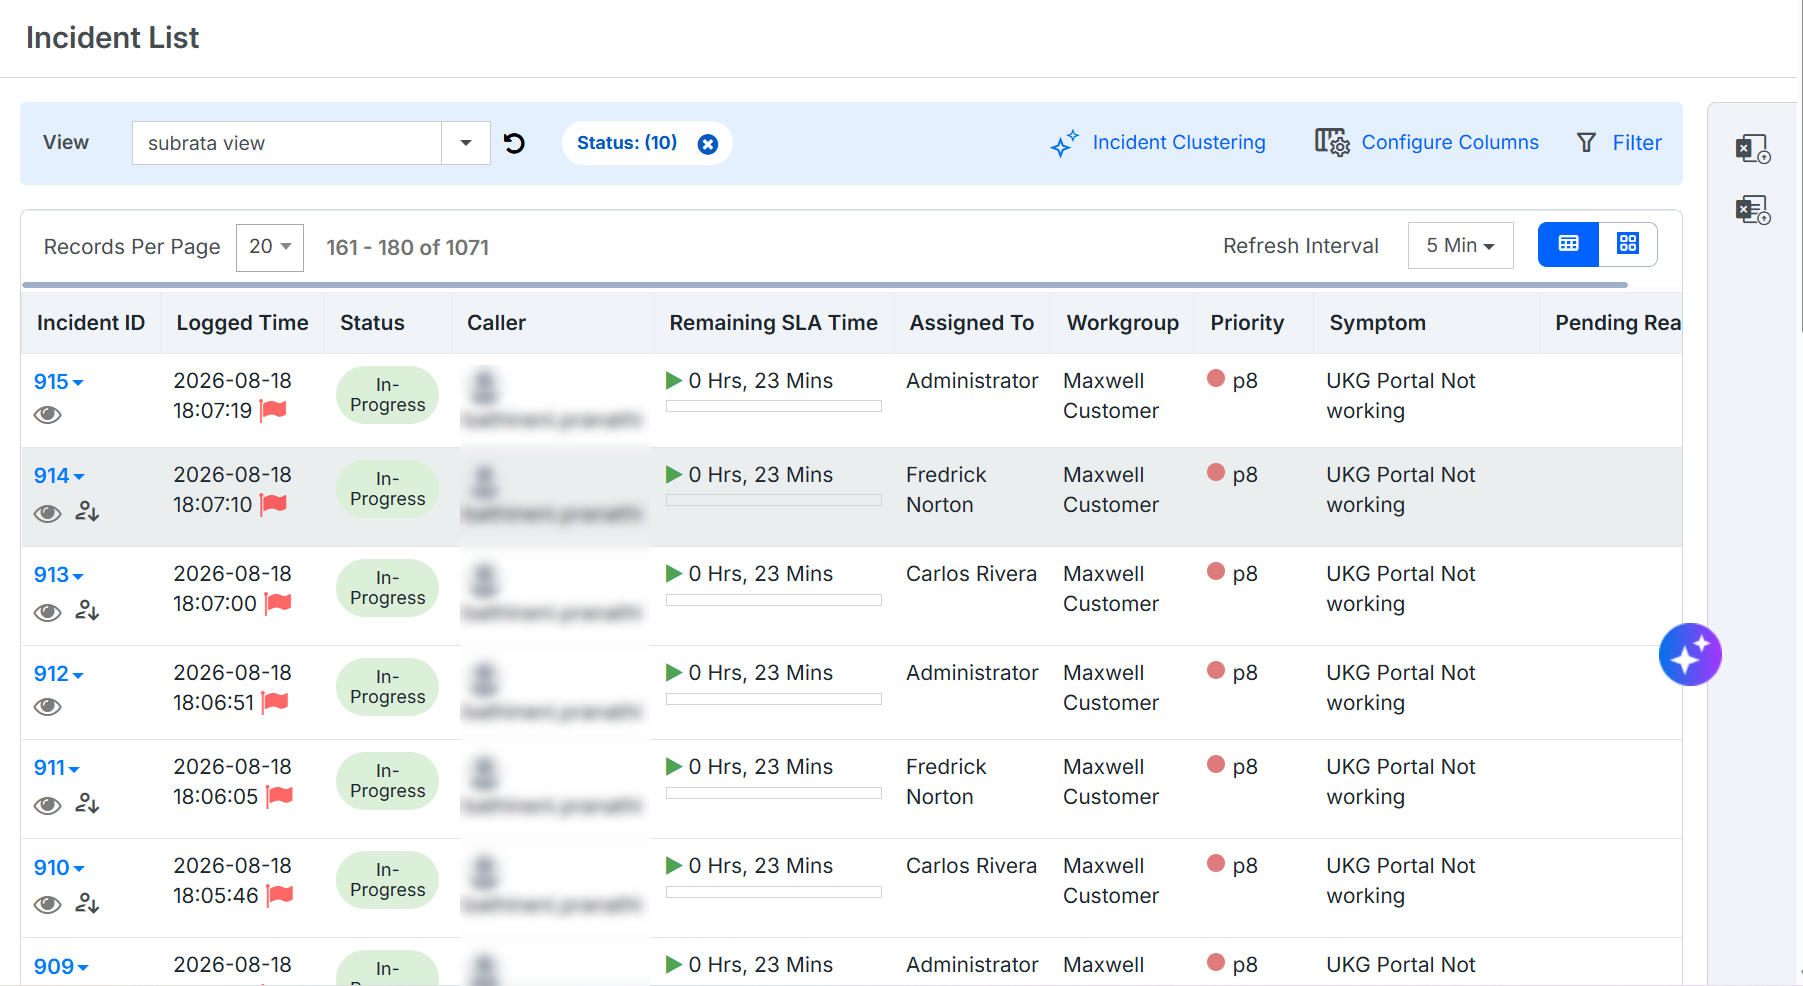 Figure: Incident List
3. Click **Incident ID** hyperlink to view the Incident Details.
4. Copy the URL from the browser address bar.
5. Identify the page path and the record ID parameter in the URL.
****Step 3: Create the hyperlink SQL expression****
Use CONCAT to combine the target page URL, encrypted record ID, and the value displayed as the clickable link.
```sql
CONCAT(
'',
CAST( AS VARCHAR),
''
) AS
```
| Placeholder | Description |
| --- | --- |
| | Base URL of the customer environment. |
| | Application page path for the record type. |
| | Encrypted record ID column from the corresponding mart table. |
| | Readable value displayed as the link, such as Incident Number or Change Request ID. |
| | Column name displayed in the report. |
> [!NOTE]
> Note
>
> Use the encrypted ID in the URL and the readable record number as the link text.
****Step 4: Create the virtual dataset****
To create a Virtual Dataset, perform the following steps:
1. Open **SQL Lab** in Apex 2.0 Reporting.
2. Create a query using the relevant mart table.
3. Add the CONCAT expression to the SELECT statement and assign a meaningful alias to the hyperlink column.
4. Include the other fields required for the report.
5. Save the query as a virtual dataset.
**Example**; Incident drill-down link
```sql
WITH tz AS (
SELECT IFNULL(gmt_time_diff, 330) AS gmt_time_diff
FROM user_timezone_mapping
WHERE username = '{{ current_username() }}'
LIMIT 1
)
SELECT
ticket_id AS Incident_ID,
CONCAT(
'',
CAST(ticket_no AS VARCHAR),
''
) AS Incident_Number,
tenant_id AS Tenant_ID,
STR_TO_DATE(
DATE_ADD(
registered_time,
INTERVAL (SELECT gmt_time_diff FROM tz) MINUTE
),
'%Y-%m-%d %H:%i:%s.%f'
) AS Logged_Time,
status AS Status,
medium AS Medium,
logged_by_user_id AS Logged_by_User_ID,
caller_user_id AS Caller_User_ID,
classification_id AS Classification_ID,
category_id AS Category_ID,
description AS Description
FROM mart_im_ticket_master;
```
> [!NOTE]
> Note
>
> Replace with the base URL of the customer environment. The query uses encripted_ticket_id for navigation and ticket_no as the displayed link text.
**Example**; Change request drill-down link
```plaintext
WITH tz AS (
SELECT IFNULL(gmt_time_diff, 330) AS gmt_time_diff
FROM user_timezone_mapping
WHERE username = '{{ current_username() }}'
LIMIT 1
)
SELECT
CONCAT(
'',
CAST(change_request_id AS VARCHAR),
''
) AS Change_Request_Id,
STR_TO_DATE(
DATE_ADD(
request_registration_time,
INTERVAL (SELECT gmt_time_diff FROM tz) MINUTE
),
'%Y-%m-%d %H:%i:%s.%f'
) AS Logged_On,
status AS Status,
category AS Category
FROM mart_cm_change_request_master;
```
> [!NOTE]
> Note
>
> Replace with the customer environment's base URL. The encrypted change request ID is used in the link, and change_request_id is displayed to the user.
****Step 5: Create and test the report****
To create and test the report, perform the following steps:
1. Create a report using the virtual dataset.
2. Add the hyperlink column, such as Incident_Number or Change_Request_Id, to the report.
3. Save and open the report.
4. Select a record number in the hyperlink column.
5. Verify that the corresponding record details page opens in a new browser tab.
You can use the dataset to create different types of reports. The drill-down link is available in the report column that contains the hyperlink expression.
## Add custom SQL to a report column
Use this method to create a drill-down link directly in a report column without creating a separate virtual dataset for the hyperlink.
****Step 1: Open the column's custom SQL editor****
1. Open the report in the Report Designer.
2. Select the column that should contain the drill-down link.
3. Open the custom SQL editor for the selected column.
****Step 2: Add the hyperlink expression****
Use the following example for an incident number column:
```sql
CONCAT(
'',
CAST(Incident_Number AS VARCHAR),
''
)
```
| SQL element | Purpose |
| --- | --- |
| | Customer environment base URL |
| Encripted_Incident_ID | Encrypted incident ID used to open the record. |
| Incident_Number | Readable incident number displayed as the clickable link. |
****Step 3: Save and test the report****
To Save and Test the Report, perform the following steps:
1. Save the custom SQL expression.
2. Save the report.
3. Open the report and select an incident number.
4. Verify that the corresponding incident details page opens in a new browser tab.
#### Best practices
- Use the correct customer environment URL. Do not use the sample URL in a customer-specific dataset or report.
- Use the encrypted record ID field required by the target application page.
- Display a readable record identifier, such as Incident Number or Change Request ID, as the link text.
- Use a clear column alias so users can identify the linked record.
- Test the link from the saved report and confirm that it opens the correct record.
- Ensure users have permission to access the target application record.