---
title: "View Problem Record"
slug: "view-problem-record-1"
updated: 2024-04-03T10:04:33Z
published: 2024-04-03T10:04:33Z
canonical: "help.symphonysummitai.com/view-problem-record-1"
---
> ## Documentation Index
> Fetch the complete documentation index at: https://help.symphonysummitai.com/llms.txt
> Use this file to discover all available pages before exploring further.
# View Problem Record
After the problem record is created, you can view the summary of the problem record. Once a PR is created, the fields cannot be modified. You can only update the additional information for the PR. The PR status is Awaiting Authorization for the approver to approve the PR.
Figure: List problem records
The different icons that are available on the View Problem Record listing page are explained in the following table:
| Field | Description |
| --- | --- |
|  | Click the preview icon to view the details of a newly created Problem Record. |
|  | Click to open the newly created Problem Record details page in a new tab or a new window. |
|  | Click to search the created Problem Records. |
|  | Click to export the list of created Problem Records to MS Excel. 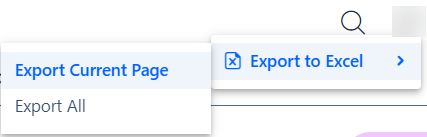 - Export Current Page - Exports the data displayed only on the current page for problem records. - Export All - Exports the data from all the pages for problem records. |
## View Problem Record
On my problem records list page, all the problem records created by you are available. Any problem record can be opened to view the details of the problem record along with the details such as the status, RCA, solution, links, and timeline.
The open problem record details page is displayed.
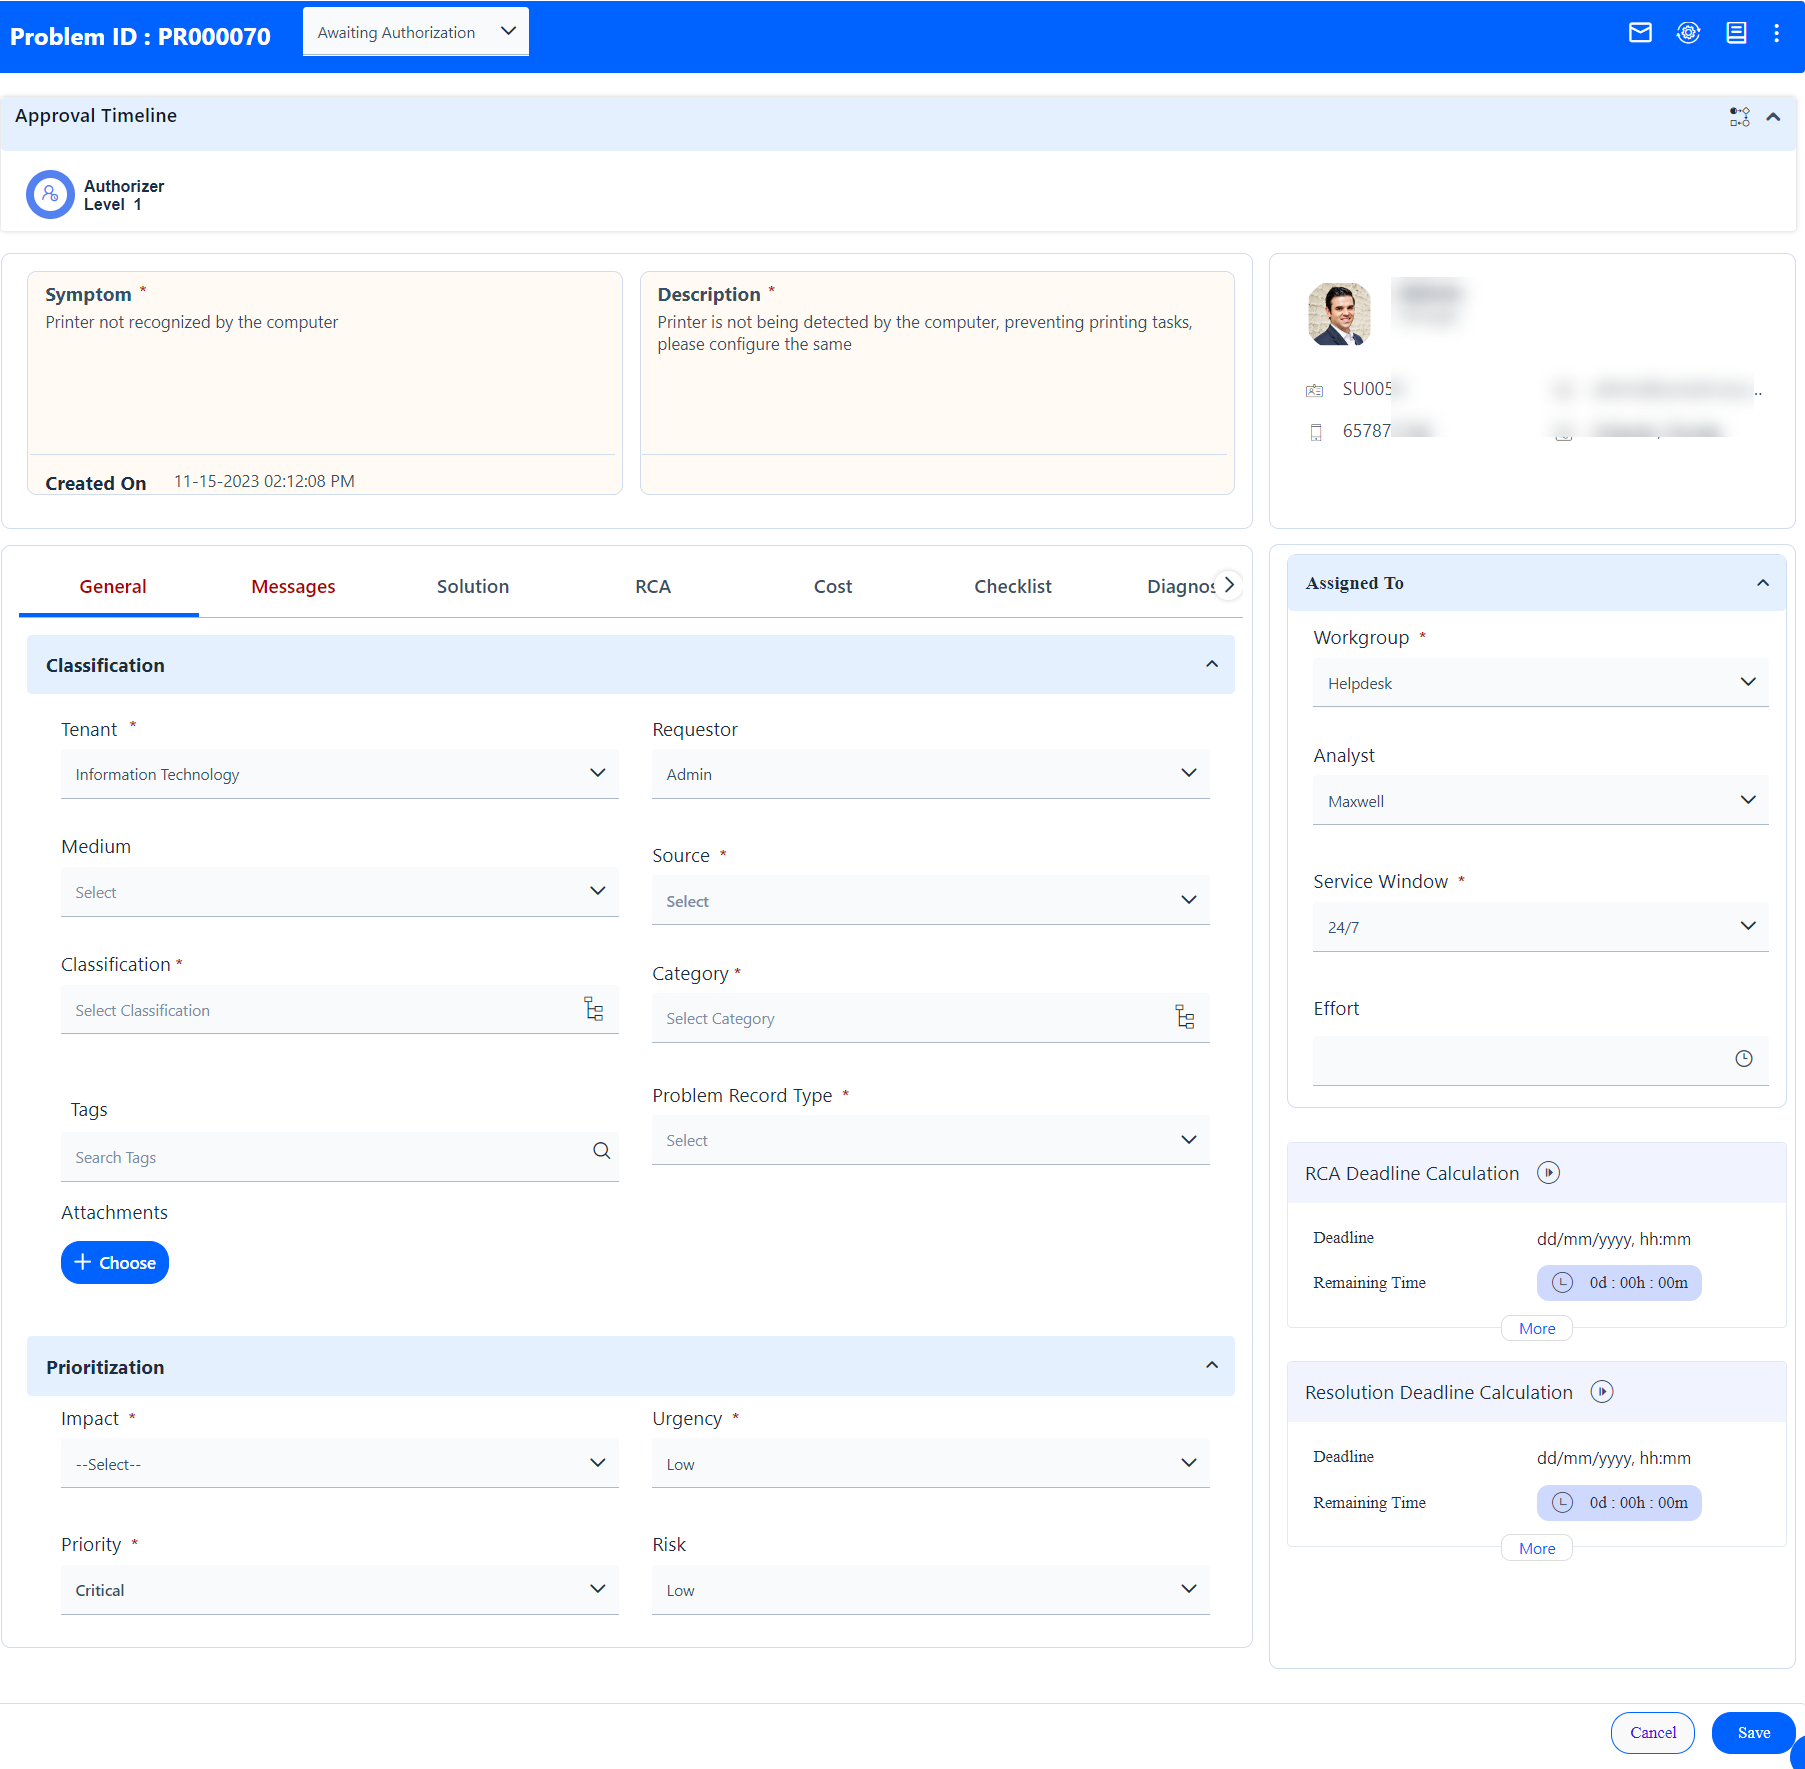
Figure: Problem record details page
Different sections on the Problem Record page are explained below:
The top most ribbon of the PR Details screen has different icons as displayed below. The Analyst can view, update different details, and take appropriate action, as needed, by clicking these icons. Figure: Top ribbon
- **Problem ID** - Displays the PR ID number.
- **Status** - Displays the status of the problem record. Click the dropdown menu to change the status of the PR as per the progress of the PR. The status of the PR can be configured dynamically as per the organization's needs.
## Send Email
Clickto send emails to the stakeholders of the PR regarding the updates related to the PR. Once you click the Send Email icon, a window pops up and the following fields are available:
- **Recipients Selection**
Select the list of contacts: by Users or by Recipients. 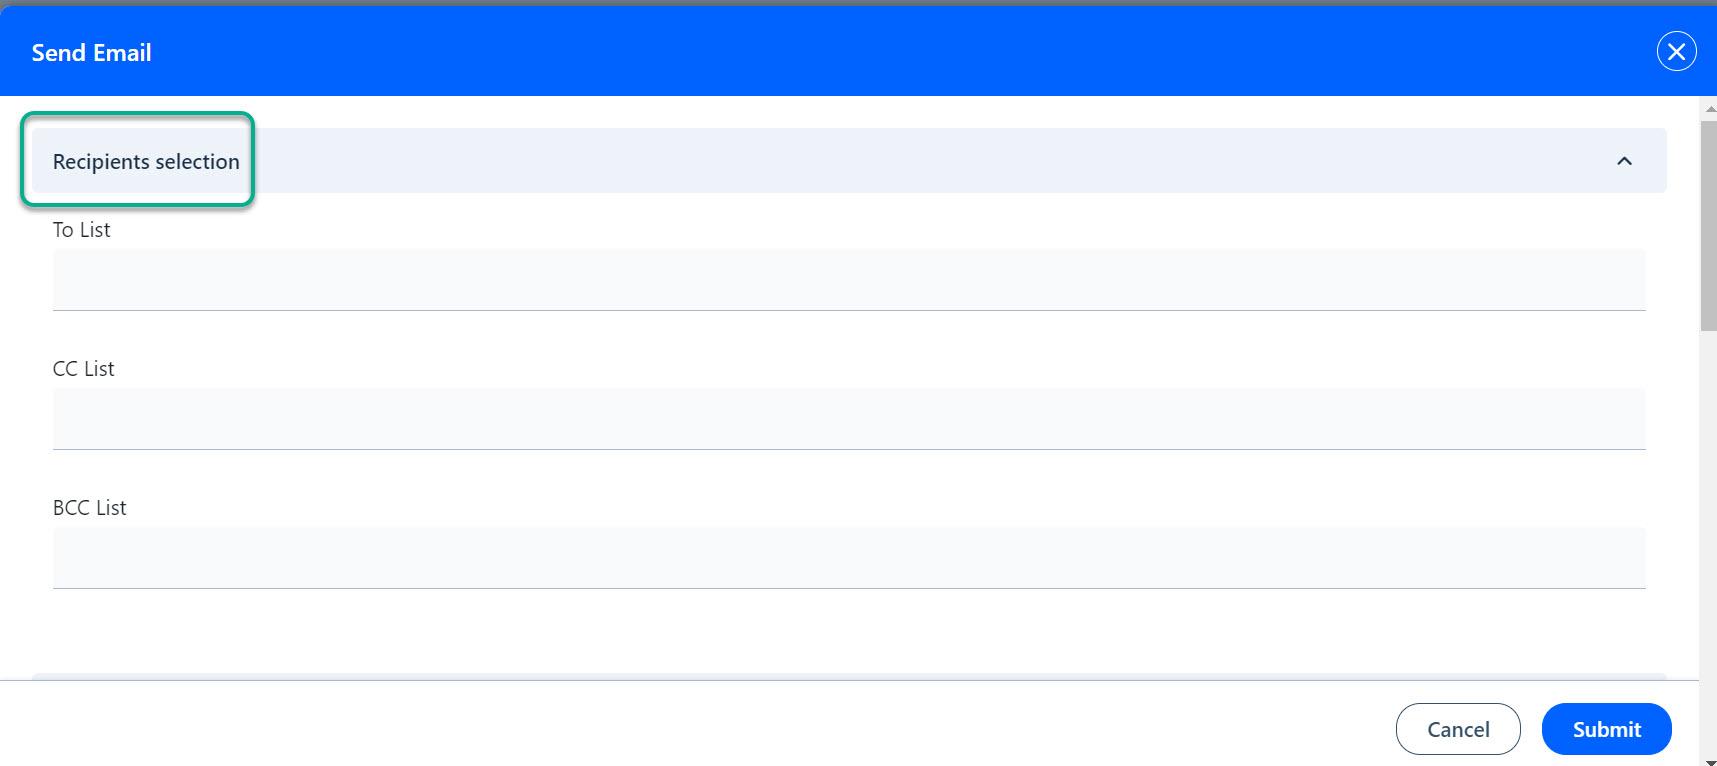Figure: Send Email - Recipient Selection
Once you click the text field, the following options appear: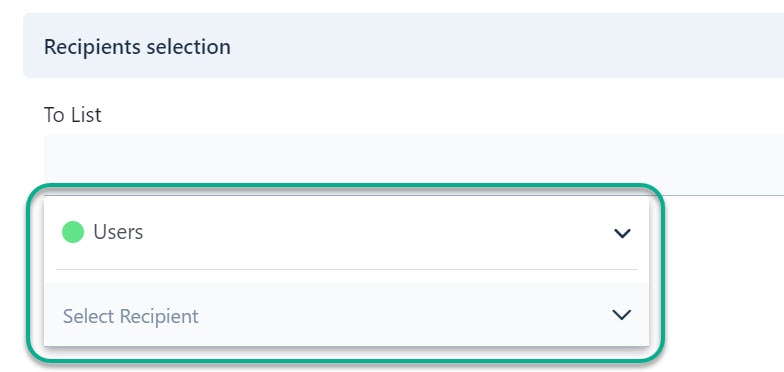Figure: Recipient Selection
Click the first option to select the group of users to which you want to send the email. The options in the dropdown menu are: **Users**, **User Groups, By Roles, Groups based on User Properties, Dynamic Groups, Approvers, Custom Email IDs.** 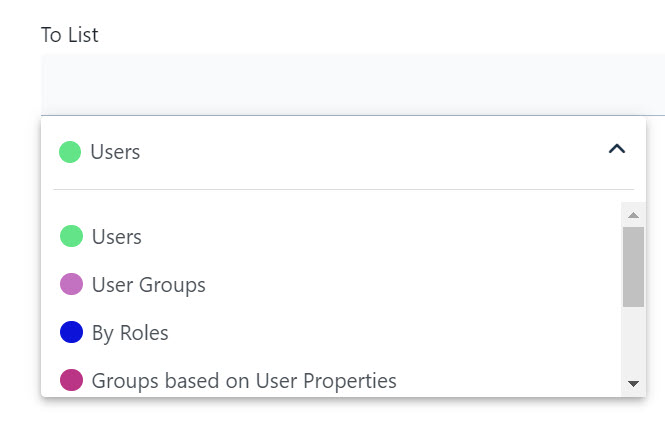Figure: Contact List - Groups
Once you select the required option from the first menu, the names of the **Recipients** are auto-populated in the next field. Click on the dropdown menu icon next to **Select Recipient** to expand the menu. It displays a list of recipients to choose from.
Figure: Contact list - recipients
You can include additional recipients who should receive a copy of the email under the **Cc** section. Add recipients in the **Bcc** section to include additional recipients who should receive a copy of the email without other recipients knowing.
- **Notification Template Selection**
Select the notification template by clicking on the **Notification Templates** dropdown menu.
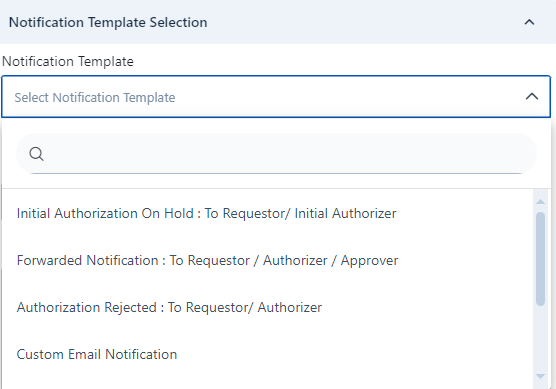Figure: Notification template selection
Specify the **Subject**, and **Body** of the email. You can also add **attachments** to the email. 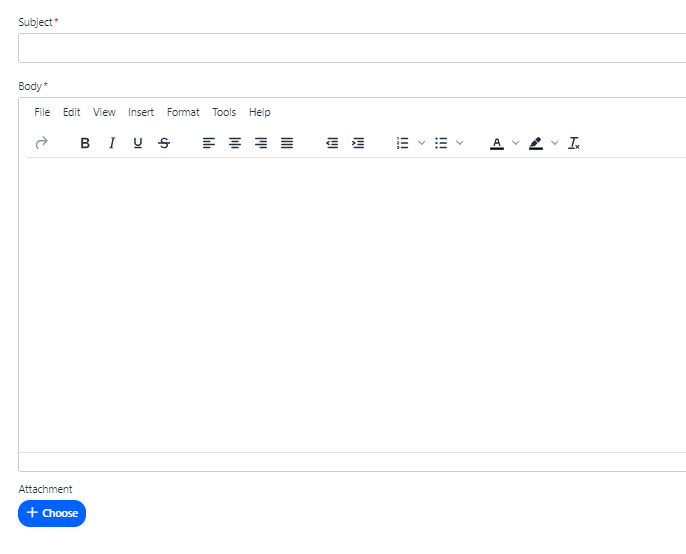Figure: Email body, subject, attachment
Click **Submit** to save the email settings. If you do now want to configure the **Send Email** option, click **Cancel**.
## **Change History**
Clickicon to view the Change History associated with the PR. The following screen appears:
Figure: Change History
The following are the different tabs in Change History to view the audit trail of the PR:
| Tab | Description |
| --- | --- |
| Change History | View the complete record or logs of all the changes made to the PR throughout its lifecycle by clicking on the **Change History** tab. View the Change History in Timeline View or Tabular View. Figure: Timeline or Tabular View Click on the date ribbon to expand it and view the complete details of the changes occurred on the PR. Figure: Change History details After clicking the date ribbon, the following screen appears that displays who made the changes to the PR and on which date and time. 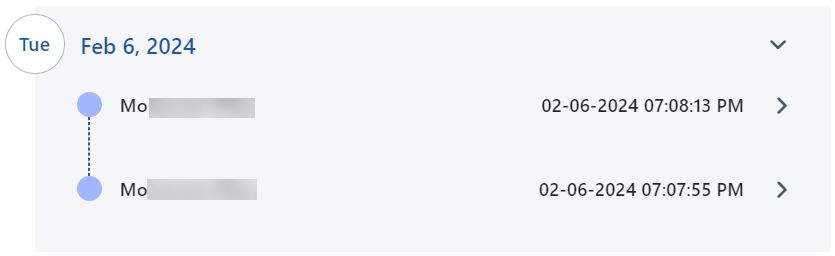Figure: Change History - Date and time changes Click the name of the person who made the change. Further details regarding the change history like Status changes, Message are displayed.  Figure: Change History - Status, Notes, Message Export to Excel all the details about Change History by clicking
 icon. |
| Communication History | Communication history is a list or documentation of all the messages, discussions, and interactions that have taken place over a given time between different people or entities. It offers an in-depth description of who spoke with whom, when, and what was said.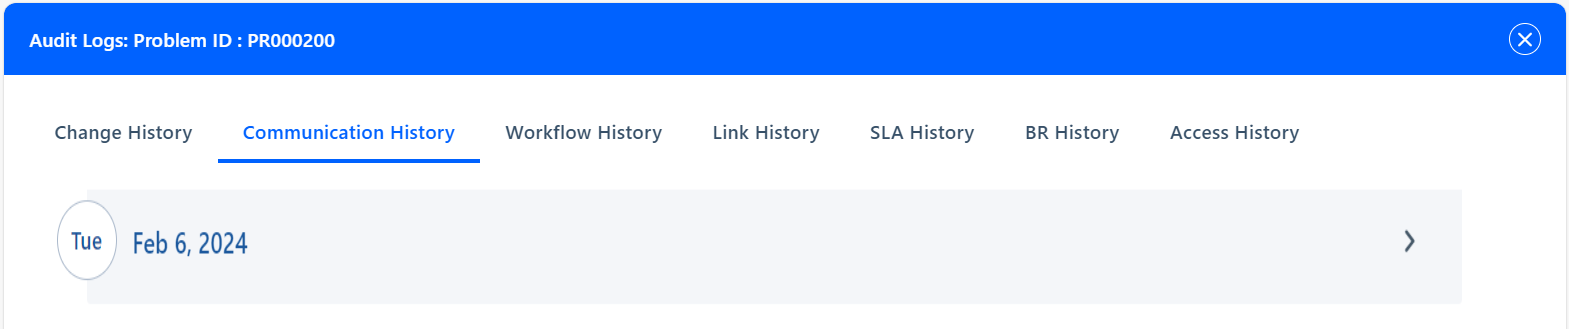Figure: Communication History Click on the date and time ribbon to expand and view the details of the communication history regarding the PR. The following screen is displayed: <> Figure: Details of Communication Click the individual name to expand and view further details about the communication. Details like to whom the communication was sent, date, time, subject, and message are displayed. <> Figure: Communication logs Click icon to view the complete communication message. The following pop-up window is displayed that shows the complete message. <> Figure: Communication message Click **X** to close the pop-up window. |
| Workflow History | View the entire history and progress of the Workflow associated with the PR in the Workflow History tab. Workflow History refers to a log or record of actions and events that have taken place during a workflow or business process. Click on the individual log to expand and view the complete details of Workflow.
 Figure: Workflow History Click
 icon to view the associated Workflow. |
| Link History | Link History is a record or log of the associations that the PR has with other records or any relevant information within the ITSM system. It helps track the history of connections between the PRs and other records, providing a comprehensive view of its lifecycle and interactions. Link History tab further has different tabs for different records that are linked to the PR. Click the individual tab to view details of the ticket which is linked to the PR. 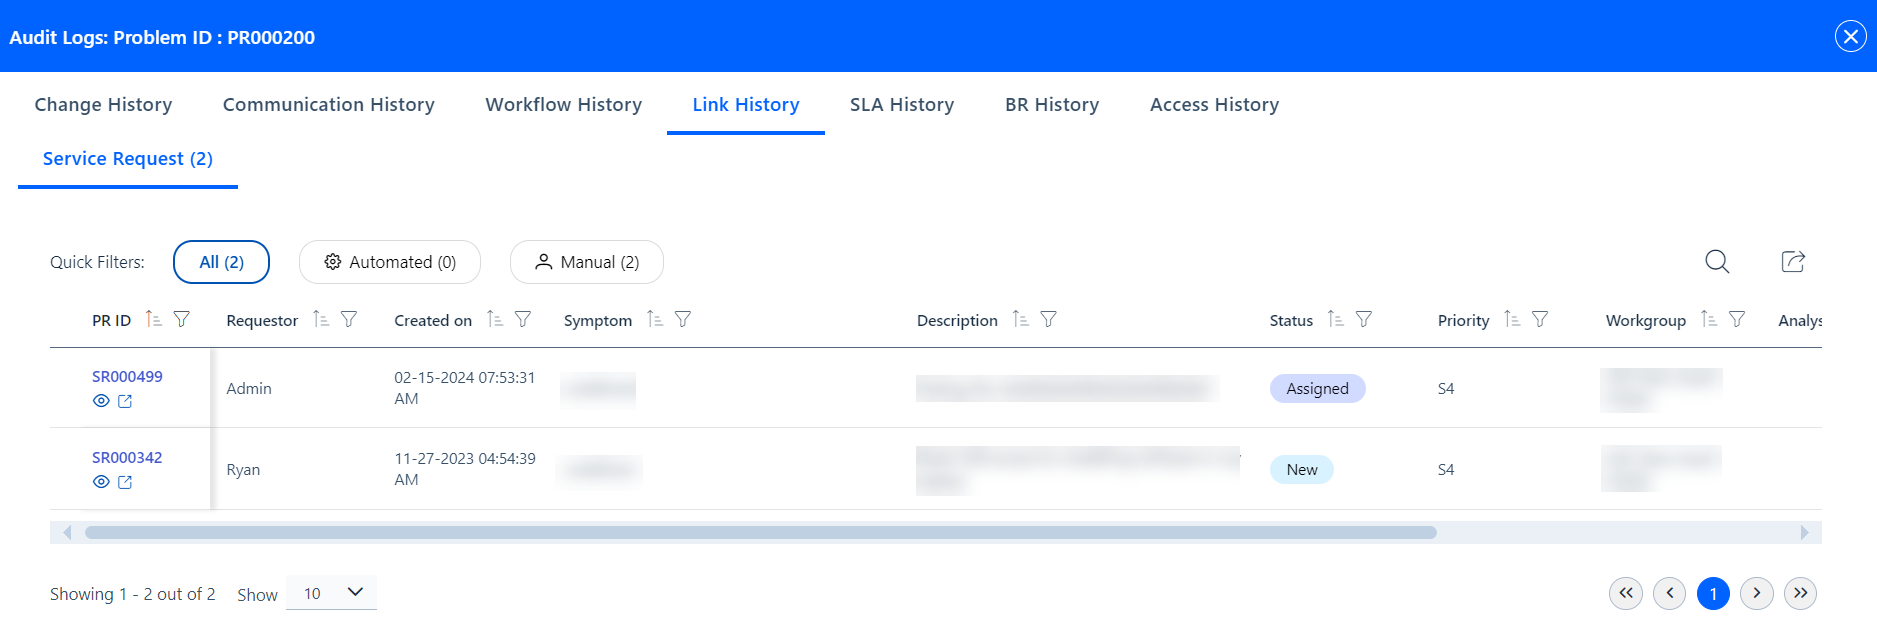Figure: Link History Click the record ID to open the details of the record in a different tab.NoteLink History is also used to track changes in the event of conversion of records. For example, when a PR is created from an Incident or vice versa, or Incident to PR, etc. |
| SLA History | The SLA history describes the progression and historical development of service-level agreements. It includes the main turning points, how SLAs have changed over time, and how businesses have utilized them to monitor and guarantee the caliber of services they offer to clients. <> Figure: SLA History There are two tabs in the SLA History tab: - Resolution SLA - Resolution SLA refers to the agreed-upon timeframe within which the team commits to resolving a PR. - Response SLA - Response SLA refers to the agreed-upon timeframe within which the team commits to respond to a PR. Each of the above tabs has the following three sections: - SLA Rule History - SLA Rule History provides a log of any rule changes adopted during the progress of the PR. Any such changes will be reflected in the SLA value being calculated for the completion of the PR. <> Figure: SLA Rule History NoteThe SLA Elapsed time is auto-calculated based on the SLA Rule selected. - **SLA Detail History** - The Detail History will have a comprehensive log of the SLA details captured to provide a birds-eye view of the status of SLA and elapsed time. <> Figure: SLA Detail History For more information about details on the SLA Detail History screen, refer to the table below: \| Field \| Description \| \| --- \| --- \| \| Status \| The status of the Form is displayed here. \| \| Start Time \| The Start time of the SLA when it is activated is displayed along with the date. \| \| End Time \| The End time of the SLA is displayed along with the date. \| \| SLA Elapsed Time \| The SLA Elapsed Time is automatically calculated based on the SLA Rule selected. \| \| SLA Status \| The status of the SLA is displayed when the cursor is hovered over the icon. \| - **SLA Deadline History** - A historical tracking of compliance with deadlines providing a history of how deadlines or timelines for the PR have been managed in the context of SLA. <> Figure: SLA Deadline History For more information about details on the SLA Deadline History screen, refer to the table below: \| Field \| Description \| \| --- \| --- \| \| SLA Rule Name \| The unique name of the SLA Rule configured. \| \| Deadline \| The Deadline as per the rule is displayed. \| \| Updated By \| This column specifies the last person who updated the records. \| \| Updated On \| This column specifies the date and time the records were last updated. \| Change the view of the SLA History by clicking the following icon: <> Figure: Change view of SLA History <> Figure: SLA Detail History - tabular view <> Figure: SLA Detail History - Timeline View You can export the details of the SLA Detail History to Excel by clicking on the Export to Excel icon. |
| Field | Description |
| Status | The status of the Form is displayed here. |
| Start Time | The Start time of the SLA when it is activated is displayed along with the date. |
| End Time | The End time of the SLA is displayed along with the date. |
| SLA Elapsed Time | The SLA Elapsed Time is automatically calculated based on the SLA Rule selected. |
| SLA Status | The status of the SLA is displayed when the cursor is hovered over the icon. |
| Field | Description |
| SLA Rule Name | The unique name of the SLA Rule configured. |
| Deadline | The Deadline as per the rule is displayed. |
| Updated By | This column specifies the last person who updated the records. |
| Updated On | This column specifies the date and time the records were last updated. |
| BR (Business Rule) History | View the list of Business Rules triggered and completed for the PR under the BR History tab. It also provides a log of the Business Rules triggered with details. 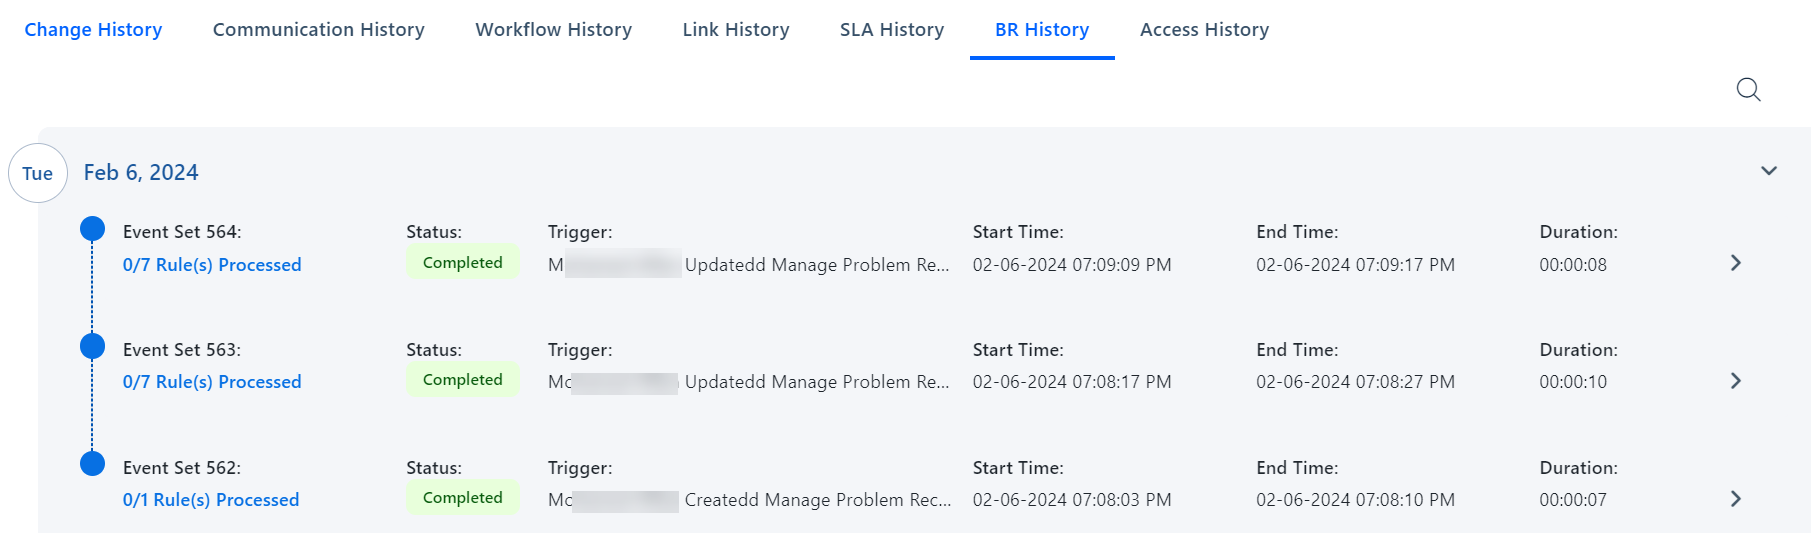Figure: BR History tab Click the date ribbon to expand and view the Business Rule in detail.
 Figure: Business Rule details Click **Rule(s) Processed** to view the Business Rules which are processed, and which are not processed. The following pop-up window opens displaying the details of the Business Rules. Click the **Conditions satisfied** tab to view the Business Rules that are triggered and satisfied for this SR. The number mentioned within the parentheses specifies the number of Business Rules which are satisfied. <> Figure: Business Rule satisfied Click the dropdown caret
 icon to expand the Business Rule. <<update screenshot>>Figure: Business Rule satisfied When you hover over the Business Rule, it will display a tooltip displaying the name of the Business Rule. Click the Business Rule to view the configured Business Rule in a new window. <> Figure: View Business Rule Click the **Conditions not Satisfied** tab to view the Business Rules that are not triggered and not satisfied for this PR. The number mentioned in parentheses specifies the number of Business Rules which are not satisfied.<> Figure: Business Rule not satisfied Click  icon to expand the Business Rule. When you hover over the Business Rule, it will display a tooltip with the name of the Business Rule. Click the Business Rule to view the configured Business Rule in a new window. Search function is available for BR History logs using keywords as shown below. <> Figure: Search Business Rule |
| Access History | It provides details of the access details and history of accesses in chronologically descending order. 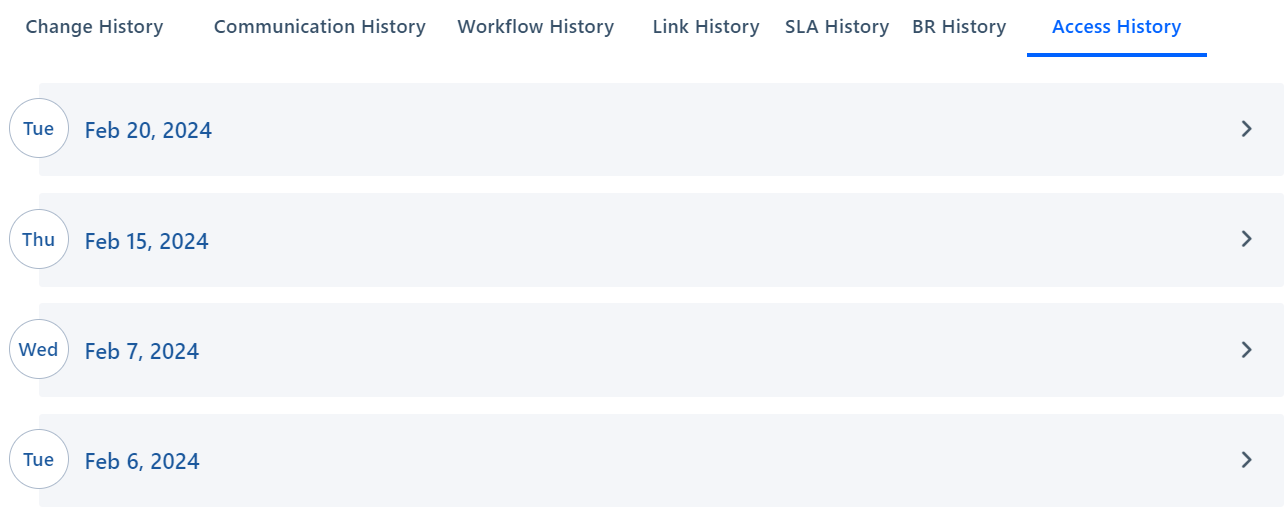 Figure: Access History Click on the individual date log to expand and view the details of who has accessed the PR and on which date and time.  Figure: Access History details |
## **User Record History**
User Record History refers to a chronological log or record of activities, changes, and updates related to a specific user's tickets. This record history provides a detailed timeline of interactions, communications, and any modifications made to a specific user's tickets throughout its lifecycle.
To view User Record History, perform the following steps:
1. Click  icon on the right corner of the top ribbon.
2. The following pop-up is displayed with the User Record History of a user who has logged a PR. The screen shows details of all the tickets created for different modules. Click on the PR ID to open the PR in a new tab. If there are many tickets logged by a user, a list of the tickets is displayed.
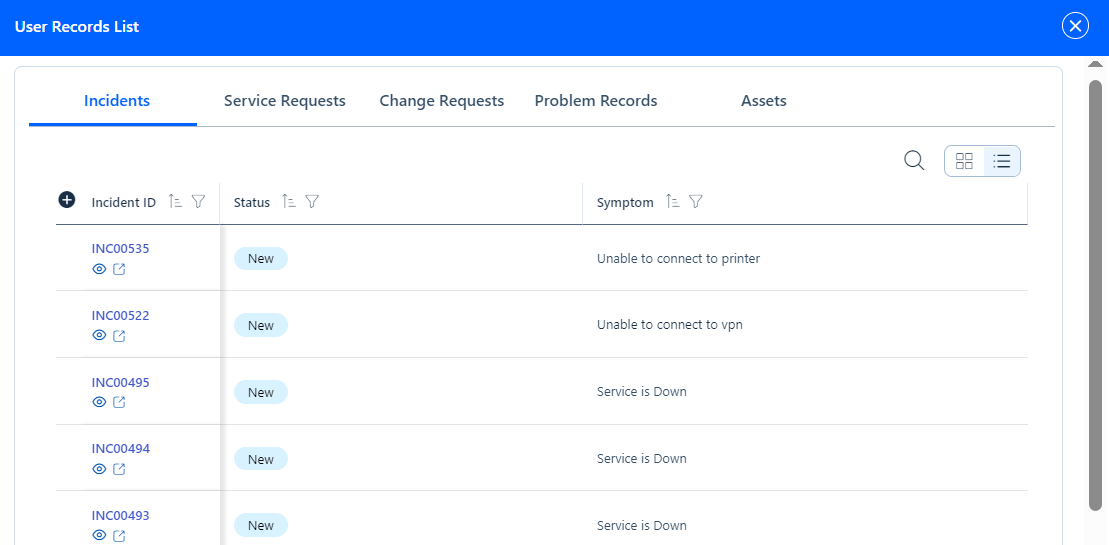Figure: User Record History
3. Click **Close** to close the pop-up of User Record History.
There are other actions that you can take on the PR by clicking on the icon. The following options are displayed: 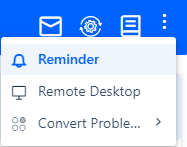Figure: PR Actions
Let us see each of the above actions in detail.
## Reminder
Reminders are notifications or alerts that are set to remind stakeholders, including analysts and requesters, about important deadlines, follow-up actions, or pending tasks related to the problem record. These reminders are designed to ensure that everyone involved in the resolution process stays informed and on track with the agreed-upon timelines.
To set a Reminder for an PR, perform the following steps:
1. Clickicon on the right of the top ribbon.
2. Select **Reminder** from the dropdown menu. The following pop-up appears:
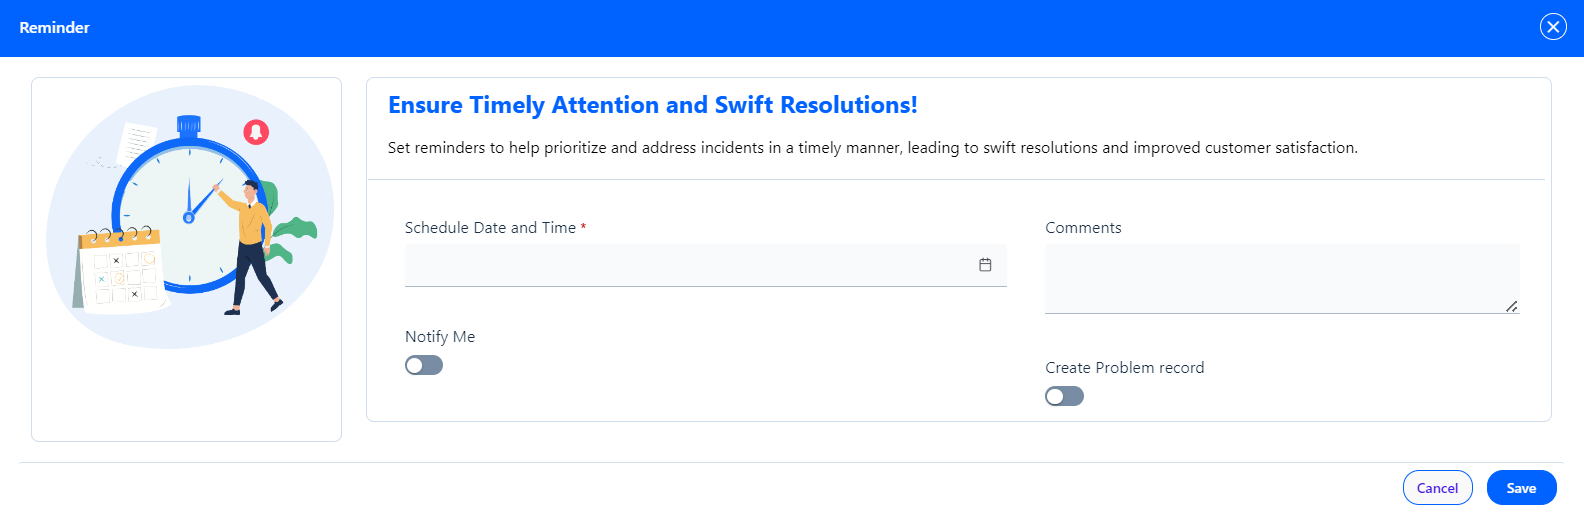Figure: PR - Reminder
3. Fill in all the details in the pop-up window. Refer to below table for the fields present in the Reminder window and their descriptions:
| **Field** | **Description** |
| --- | --- |
| Schedule Date and Time* | Click the icon to open the calendar. Select the date and time for which you want to schedule a reminder to trigger. |
| Comments | Add relevant comments to communicate additional information, updates, or context related to the reminder about the SR. |
| Notify me | Enable the **Notify me** switch if you want to receive notifications. |
| Create Problem Record | Enable the **Create Problem Record** switch to log an PR. |
4. Click **Save** to set the reminder. If you do not want to save the details and exit the pop-up, click **Cancel**.
## Remote Desktop
Remote Desktop refers to configuring an option for accessing and managing a user's computer or device remotely. Remote Desktop allows Analysts to connect to a user's system over a network, view their desktop, and, in some cases, control the desktop.
To configure Remote Desktop, perform the following steps:
1. Clickicon on the right of the top ribbon.
2. Select **Remote Desktop** from the dropdown menu. The following pop-up appears:
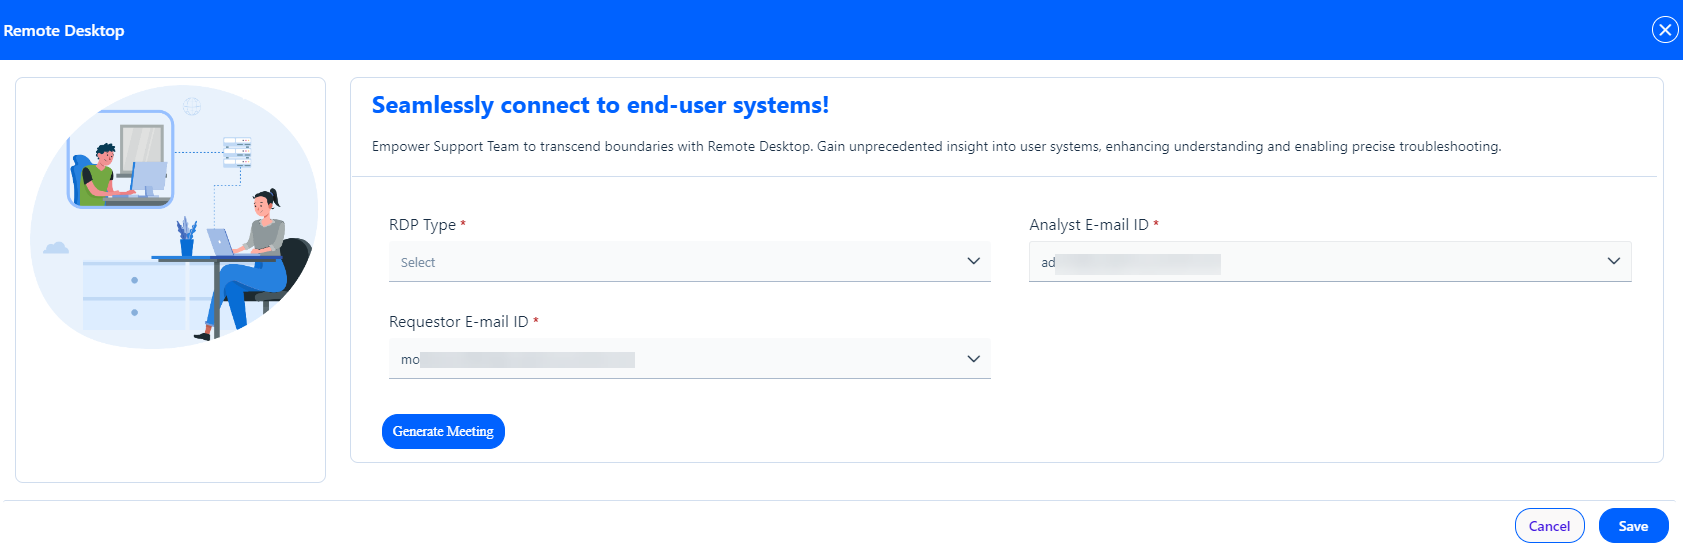Figure: Remote Desktop
3. Fill in all the details in the pop-up window. Refer the below table for the fields present in the Reminder window and their descriptions:
| **Field** | **Description** |
| --- | --- |
| RDP (Remote Desktop Type) Type* | RDP Type refers to the specific channel, method, or software used for Remote Desktop access. Select the type of RDP from the dropdown menu. |
| Analyst E-mail ID* | Mention the email ID of the Analyst who will have access to the user's desktop. |
| Requestor E-mail ID* | Mention the email ID of the Requestor who has logged the PR. |
| Generate Meeting | Clickicon to generate a link for a meeting between the Analyst and the Requestor. |
4. Click **Save** to set Remote Desktop for the PR. If you do not want to save the details and exit the pop-up, click **Cancel**.
## Convert Problem Record
Convert Problem Record enables you to convert the PR into different types of records, such as Incidents, Service Request, or Change Requests, or Fixed Asset. By doing so, you can efficiently manage and address specific issues associated with the converted record type.
To convert an PR, perform the following steps:
1. Clickicon on the right of the top ribbon.
2. Navigate to **Convert Problem Record** from the dropdown menu. Select the type of record to which you want to convert the PR.
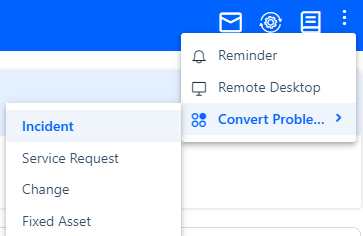 Figure: Convert PR - dropdown menu
3. Once you select the type of record to which you want to convert the PR into, it will open a new details page of the selected record type. The details are auto populated from the PR.
## Approval Timeline
The Approval Timeline depicts the progress and status of approvals. Clickicon to view the Workflow diagram associated with the Approval Timeline. 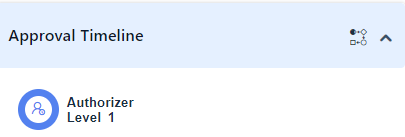Figure: View Workflow Diagram
Once you click, the following diagram displays: 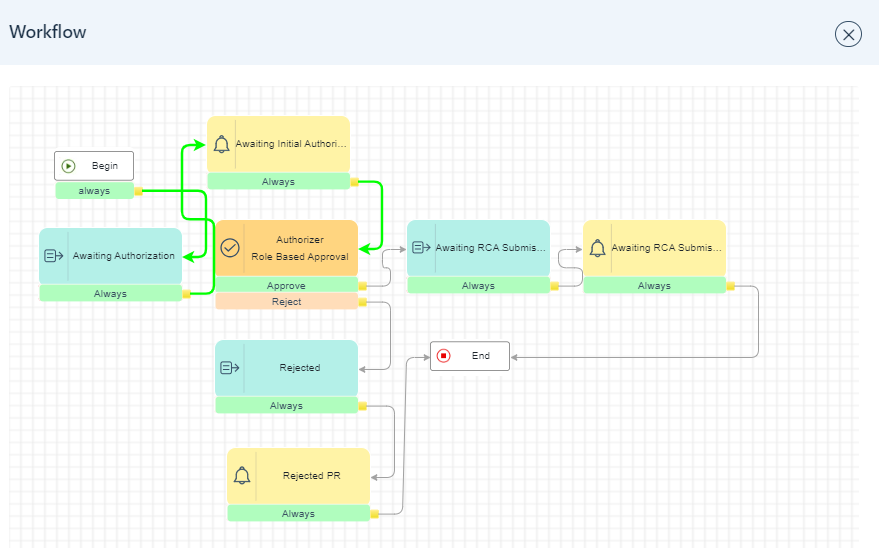Figure: Workflow Diagram - Approval Timeline
When you click on any of the levels in the Approval Timeline, it will display the complete details of that particular PR. 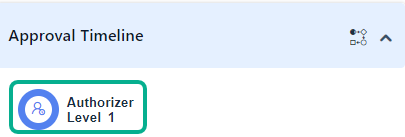Figure: Approver
The details include Approver Name, Status, Updated Time, and Remarks, if any. 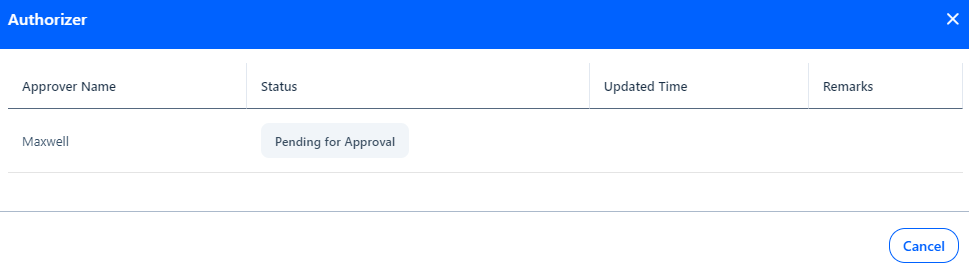Figure: Approver details
**Subject**
The Subject card displays the title of the PR that gives an idea of what the PR is about. This card also shows the date on which the PR was created. When you hover over the Subject card, the Edit option appears on the top right corner of the card. 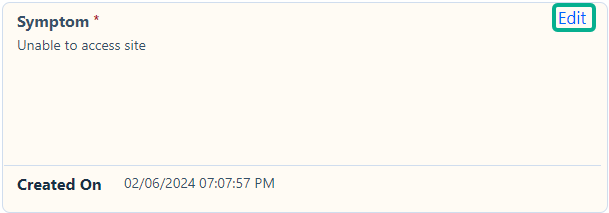Figure: Edit PR Subject
When you click on Edit, the following screen appears. You can edit the Subject of the PR and change its formatting as well. 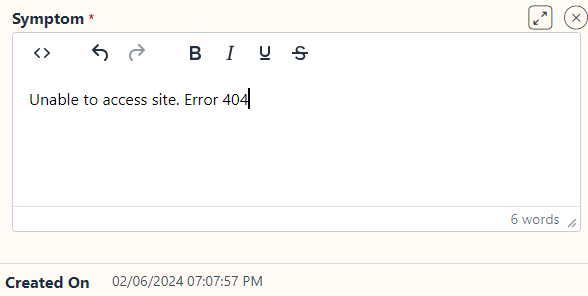Figure: Edit PR subject
**Description**
The Description card displays detailed information about the PR. You can edit the Description of the PR. When you hover over the Description card, the Edit option appears on the top right corner of the card. 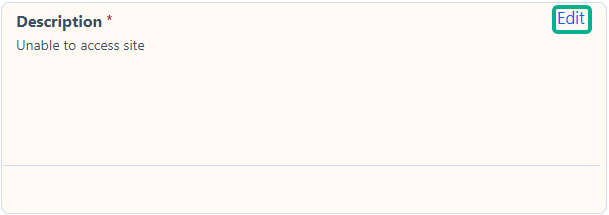Figure: Edit PR description
When you click on Edit, the following screen appears. You can edit the Description of the PR and change its formatting as well. 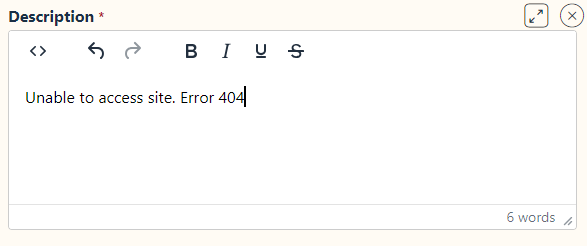Figure: Edit PR description
**Requestor Details Card**
The Requestor details card displays the details of the requestor who has logged the PR. The details include information like employee ID of the requestor, email ID, location, designation, and other relevant details. 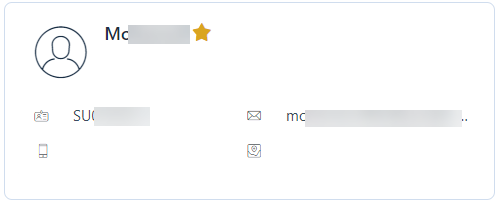Figure: Requestor details card
**Assigned To**
| **Field** | **Description** |
| --- | --- |
| Workgroup | This field shows the assigned Workgroup to the PR. You can update the assigned Workgroup for a particular PR from the dropdown menu. The options of Workgroup in the dropdown menu will be populated as per the Tenant selected in the General tab. 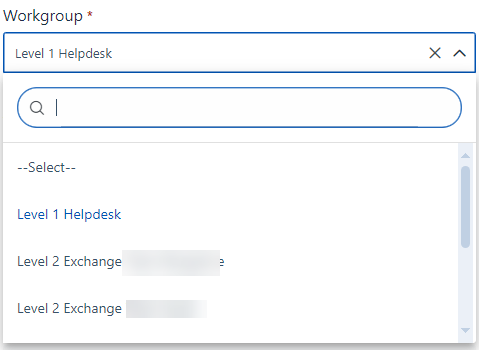Figure: Assigned Workgroup |
| Analyst | This field shows the assigned Analyst to the PR. The options of Analysts in the dropdown menu will be populated as per the Workgroup selected. You can update the assigned Analyst for a particular PR from the dropdown menu. 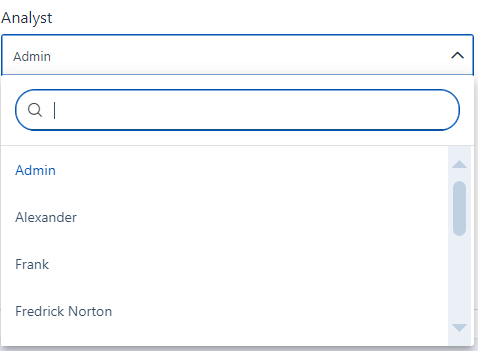Figure: Assigned Analyst |
| Service Window | This field shows the Service Window applicable to the PR. Define the Service Window applicable to the PR. The options in the dropdown menu will be populated as per the **Tenant** selected in the General tab. |
| Effort | Capture the efforts that will be required to resolve the PR in Days, Hours, and Minutes. 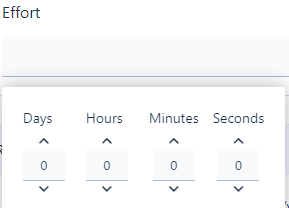Figure: Effort |
| RCA Deadline Calculation | This field shows the Deadline, Total Time, and Remaining Time to submit the RCA for the PR. It displays the deadline within which RCA should be submitted for the PR. You can expand or collapse this section by clicking More or Less, respectively.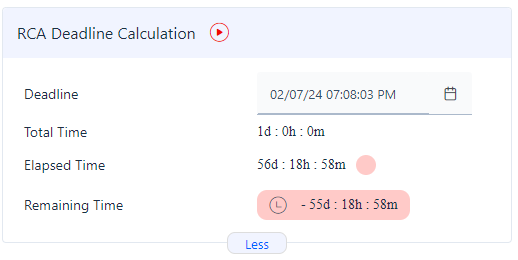Figure: RCA Deadline CalculationNoteThe remaining time is calculated based on the service window selected. Any violation of SLA will be highlighted. This field can be edited based on the configurations in SLA. Any changes made will be reflected in the SLA History. |
| RCA Deadline Violation Remarks | Provide the information or comments regarding any violation of the RCA related to response times.  Figure: RCA Deadline Violation Remarks |
| Resolution Deadline Calculation | This field shows the Deadline, Total Time, Elapsed Time, and Remaining Time to resolve the PR. You can expand or collapse this section by clicking More or Less, respectively. 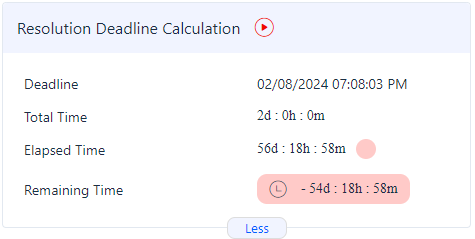Figure: Resolution Deadline Calculation |
| Resolution Deadline Violation Remarks | Provide the information or comments regarding any violation of the resolution-related timelines. Figure: Resolution Deadline Violation Remarks |
## Tabs in PR Details Screen
Refer to the following sections for details on each tab of the problem record.
**General**
| Field | **Description** |
| --- | --- |
| **Classification** |
| Tenant* | Select the required tenant from the dropdown. |
| Requestor | Displays the name of the requestor who has created the problem record. |
| Medium | Specifies the medium by which the problem record is logged. The available options are Chatbot, Mail, Mobile App, Others, Phone, and Web. |
| Source* | Specifies the source by which the problem record is logged. |
| Classification* | Specifies the classification selected for the problem record. 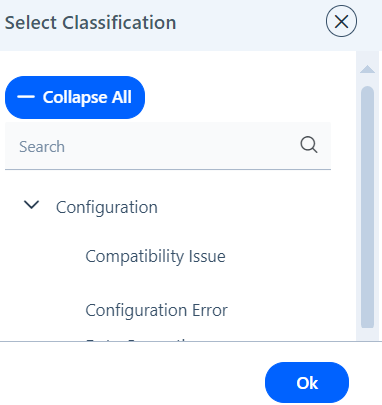 Click **Collapse All** to collapse the classification list. |
| Category* | Specifies the category selected for the problem record. 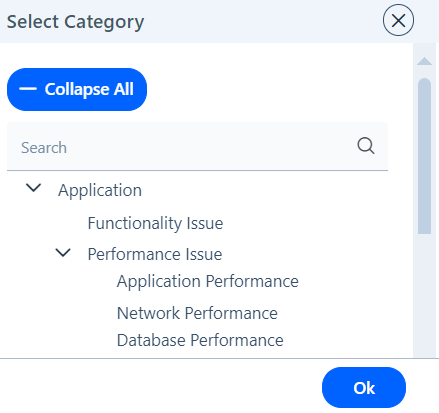 Click **Collapse All** to collapse the classification list. |
| Tags | Specifies the unique tags added to the problem record. |
| Problem Record Type* | Specifies if the problem record is a Proactive Problem problem record or a Reactive Problem problem record. |
| Attachments | Displays the attachments added to the problem record. The supported attachment formats are PDF, email, PNG, and JPEG. Click **Choose** to upload the attachments. |
| **Prioritization** |
| Impact* | Specifies the impact of the problem record. The impact can be selected as High, Medium, or Low. |
| Urgency* | Specifies the urgency of the problem record. The urgency can be selected as High, Medium, or Low. |
| Priority* | Specifies the priority of the problem record. The priority can be selected as P1, P2, P3, etc. |
| Risk | Specifies the risk of the problem record. The risk can be selected as High, Medium, or Low. |
**Messages**
| Field | **Description** |
| --- | --- |
| User Communication | The comments updated by the user i.e., the requestor of the problem record is displayed in this tab. The analysts working on the problem record can use this field to communicate with the requestor. |
| Private Log | The comments updated by the analysts working on the problem record are displayed in this tab. The comments updated in the private log are not accessible to the end users. |
| Message* | Type in a message to be sent to the user who has logged the PR. |
| Notes for self | Type in notes for the analysts working on the PR. These notes are not visible for the user who has logged the PR. |
**Solution**
| Field | **Description** |
| --- | --- |
| Solution | Specifies the solution provided to resolve the problem record. The text editor is a rich text editor.  |
| Resolution Code | Specifies the resolution code for the problem record. It has to be used while resolving the problem record. |
| Closure Code* | Specifies the closing code for the problem record. It is updated when the problem is marked as closed. |
| Closure Category | Specifies the category of the closure codes. |
| Workaround Exists | Specifies if any workaround exists for the problem record. If the field is selected yes, the workaround details textbox appears. If the field is selected no, the workaround details textbox does not appear. |
| Workaround details | Specifies the detailed workaround for the problem record if any. |
| Link to a knowledge record | Enable this toggle button if you wish to link any knowledge article to the resolved problem record. |
| Link the article that helped | Mention the link of the knowledge article used to resolve the problem record. |
**RCA**
| Field | **Description** |
| --- | --- |
| RCA Methodology | Select the RCA Methodology used to resolve the problem record. The available options are the 5 Why analysis and Fishbone analysis. |
| Root Cause Analysis | Displays the fishbone analysis of the RCA performed. Click on the fishbone icon to view the fishbone diagram of the RCA.  |
| Type | Specifies the type of the RCA performed for the problem record. |
| RCA Category | Specifies the category of the RCA type performed for the problem record. |
| Details | You can enter the details of the RCA performed for the problem record. |
| RCA Attachment | You can attach any documents related to the RCA such word, PDF or email. Click **Choose** to upload the attachments. |
| Actual | Enable the toggle button for the RCA, which is the actual cause of the PR. The RCA that is marked as Actual is displayed in red color in the Fishbone diagram. |
| RCA Results | Specifies the results of the RCA performed for the problem record. |
**Cost**
| Field | **Description** |
| --- | --- |
| Estimated Cost* | This tab provides the details of the estimated cost involved in resolving the problem record. The History  icon provides the details of the history of changes made to the estimated cost. |
| Currency | Specifies the currency in which the estimated cost is quoted. Select the currency from the dropdown list. |
| Estimated Cost | Specifies the estimated cost involved in resolving the problem record. |
| Estimated Item Description | Specifies the details of the items involved in resolving the problem record. |
| Add | Click Add to save the estimated cost details. |
| Cancel | Click Cancel if you wish not to save the estimated cost details. |
| List | Displays the list of all the estimated cost details. |
| Actual Cost | Specifies the actual cost details involved in resolving the problem record. |
| Currency | Specifies the currency in which the actual cost is quoted. Select the currency from the dropdown list. |
| Actual Cost | Specifies the actual cost involved in resolving the problem record. |
| Actual Item Description | Specifies the details of the items involved in resolving the problem record. |
| Add | Click Add to save the estimated cost details. |
| Cancel | Click Cancel if you wish not to save the estimated cost details. |
**Checklist**
In this tab, you can define a set of checklist items that an analyst should check before creating the PR, approving the PR, or resolving the PR. The checklist can comprise questions and answers or a textbox to enter the required information. A sample screenshot with configured checklist is displayed below: 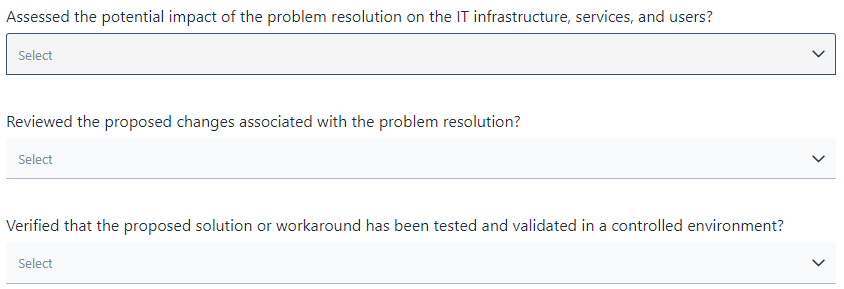Figure: Checklist
**Diagnostic**
| Field | **Description** |
| --- | --- |
| Activity | This tab provides the details of the activities performed on the PR. You can enter all the diagnostic information done to resolve the PR. The History  icon provides the details of the history of changes made to the diagnostic tab. |
| Result | Specifies the result of the diagnosis done on the PR. |
| Attachment | Specifies the attachments added for the diagnosis performed. |
| List | Displays the list of all the diagnostic details. |
| Add | Click Add to save the diagnostic details. |
| Cancel | Click Cancel if you wish not to save the diagnostic details. |
**Problem Review**
| Field | **Description** |
| --- | --- |
| Planned Review Date | Specifies the planned date for reviewing the PR. |
| Actual Review Date | Specifies the actual date for reviewing the PR. |
| Problem Review | Specifies the details of the PR that has been reviewed. |
| RCA Reviewer | Select the name of the reviewer who has performed the RCA. |
| Review Date | Select the date on which the review was performed. |
**Links**
Links tab allows to establish connections between the PR and other records from the same module, different modules, or from different applications. Users can either link existing records or create new ones directly from the Problem record details page.
Analysts can perform the following actions through the Links tab:
- Create
- Link
- De-link
Create a new record from the PR with **Create** button. Link the PR to other incidents, service requests, problem records, or change requests with **Link** button. You can also de-link records that are linked to the PR. 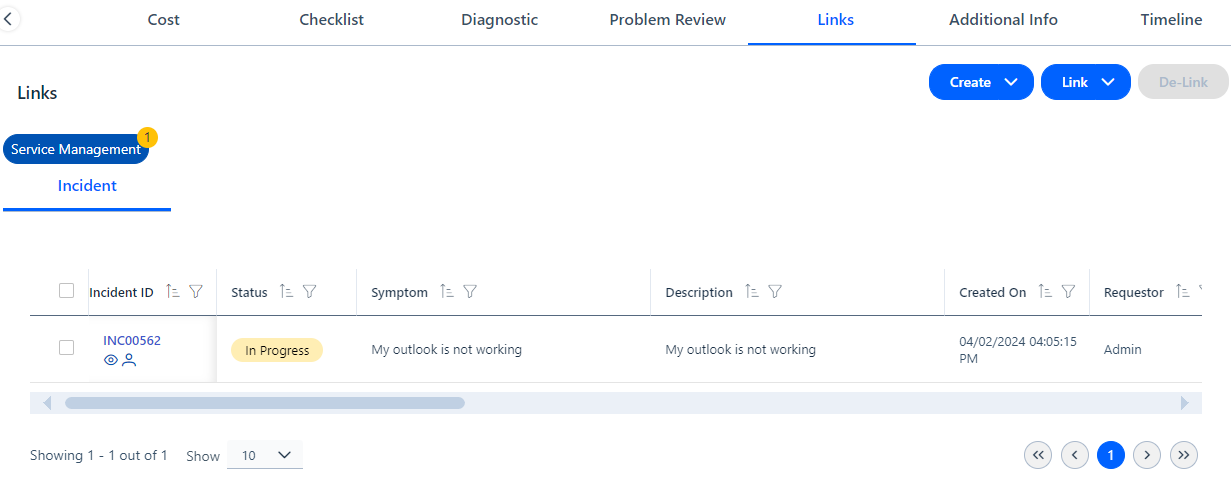Figure: Links
**Additional Info**
Any additional information related to the PR can be mentioned in this tab.
**Timeline**
Timeline displays the chronological events and timestamps of tasks and progress on the PR. This field is crucial for tracking the progress of the problem record and providing a comprehensive view of the actions taken throughout its lifecycle.
Timeline displays a detailed log of actions taken by analysts, including status changes, dates, and times. A sample screenshot is displayed.
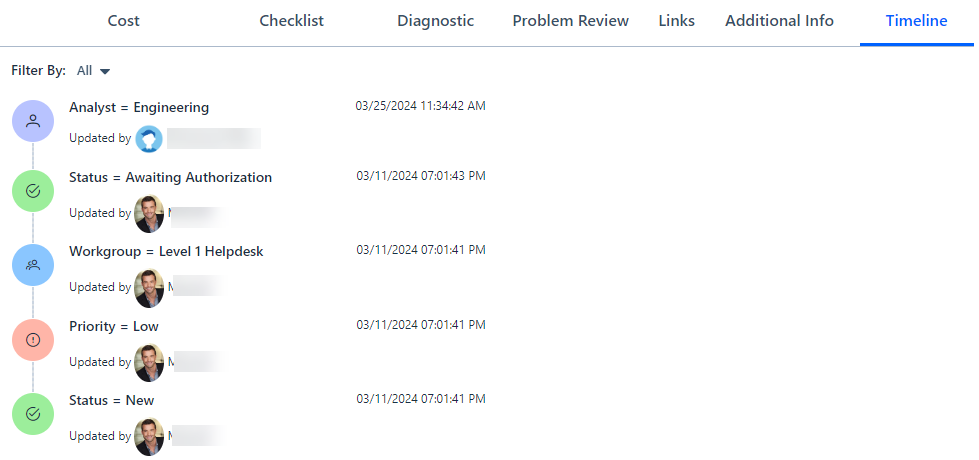Figure: Timeline
A workgroup is a small group or team of individuals who come together to collaborate on a specific task or project within an organization.
A service window typically refers to a designated period of time during which a particular service or activity is available or accessible to customers or clients.
A proactive problem record focuses on identifying and addressing the root causes of incidents and recurring issues to prevent them from happening again.
Reactive problem record is triggered in response to incidents that have already taken place. When an incident is recognized as a symptom of an underlying problem, a reactive problem record is created to manage the investigation and resolution of that problem.
Five whys (or 5 whys) is an iterative interrogative technique used to explore the cause-and-effect relationships underlying a particular problem. The primary goal of the technique is to determine the root cause of a problem by repeating the question "Why?" five times. The answer to the fifth why should reveal the root cause of the problem.
Fishbone analysis, also known as Ishikawa diagram or cause-and-effect diagram, is a problem-solving technique used to identify and explore the various potential causes contributing to a particular issue or problem. The technique gets its name from its visual representation, which resembles the skeleton of a fish, with the problem or effect being depicted as the "head" and the potential causes branching out like "bones."