Business Rules bring automation into everyday Change Management operations by allowing administrators to define what should happen, when it should happen, and under which conditions.
Using the Business Rule Designer, administrators can configure rules to handle routine tasks such as updating Change records, triggering notifications, escalating high-risk changes, and coordinating related record updates.
Whether it is validating critical information before a Change progresses, automatically updating records after implementation, or scheduling periodic activities, Business Rules help organizations reduce manual effort and keep operations running smoothly.
With flexible execution modes, configurable conditions, and multiple action types, administrators can tailor automation to their operational needs while ensuring consistent and controlled Change processes.
Key Benefits
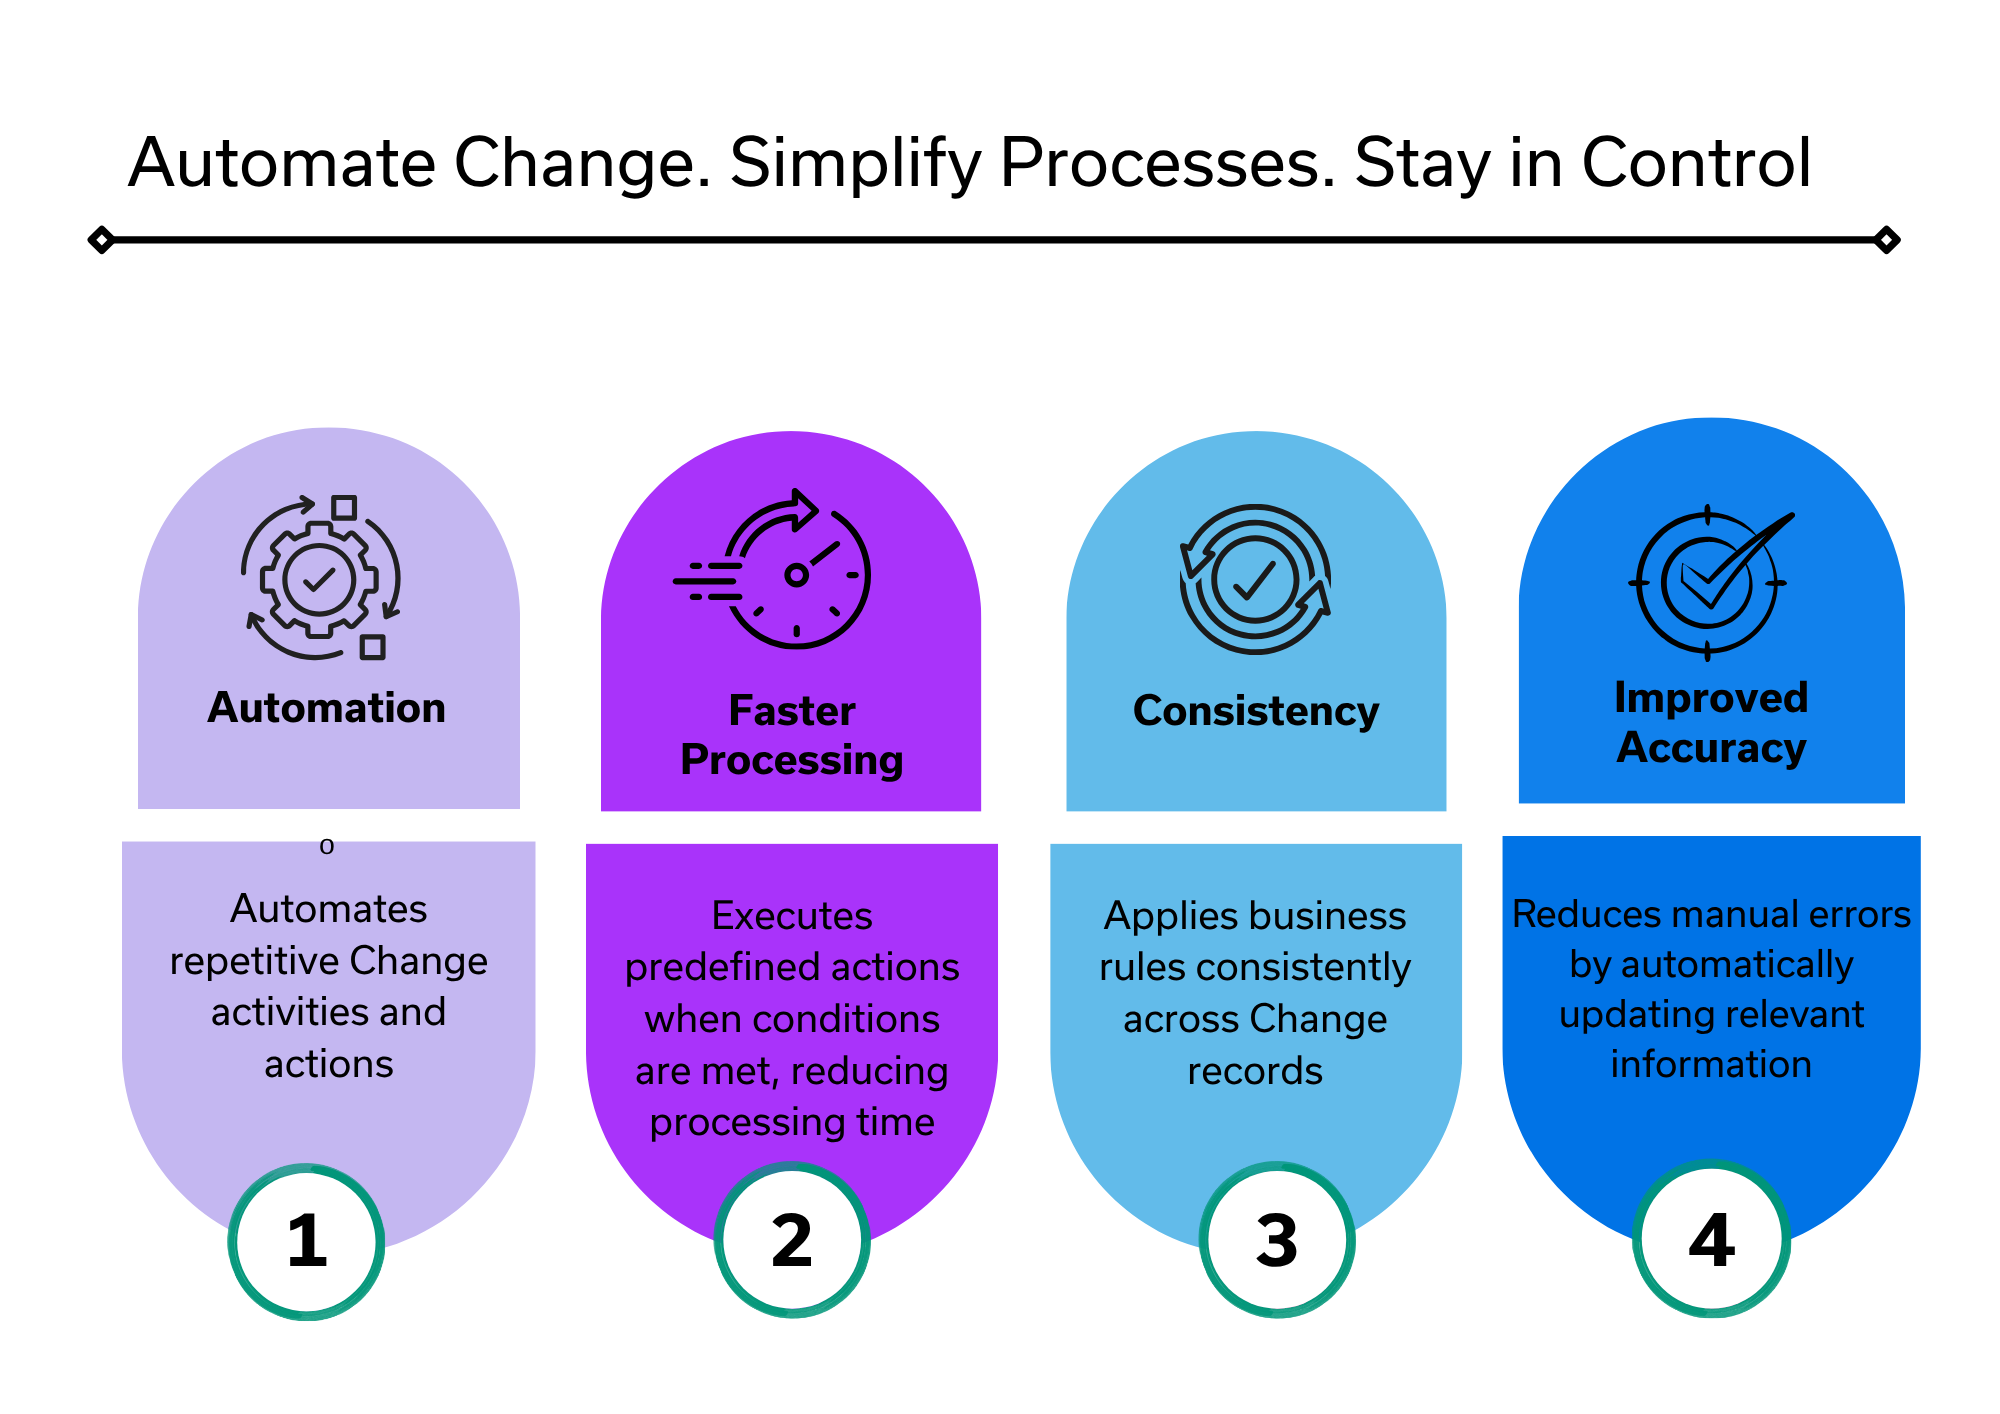
The following infographic depicts the key benefits of Business Rules in Change Management.
Use Case
Let us explore the following use case for better understanding.
Use Case | Solution |
Ira is a Change Analyst at NovaTech who manages changes across multiple enterprise applications. She is responsible for ensuring that each Change record contains the required implementation and risk details. One afternoon, Ira updates a Change to the status “Ready for Implementation”, but the record is missing mandatory information such as Implementation Plan, Backout Plan, and Risk Assessment. NovaTech wants to ensure that analysts cannot proceed with the Change without providing all required implementation and risk information. | A Business Rule is configured in After execution mode under Change Management. The rule runs immediately after Ira submits the Change record and checks whether the required implementation and risk details are available. If any required information is missing, the configured action is triggered to prevent the Change from proceeding without complete information. |
Configure Business Rules for Change Management
To configure a business rule, perform the following steps:
Login as an Administrator and select the Admin Workspace.
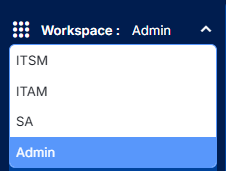
Figure: Workspace - Admin
Select Infrastructure from the left panel and then select Business Rule.
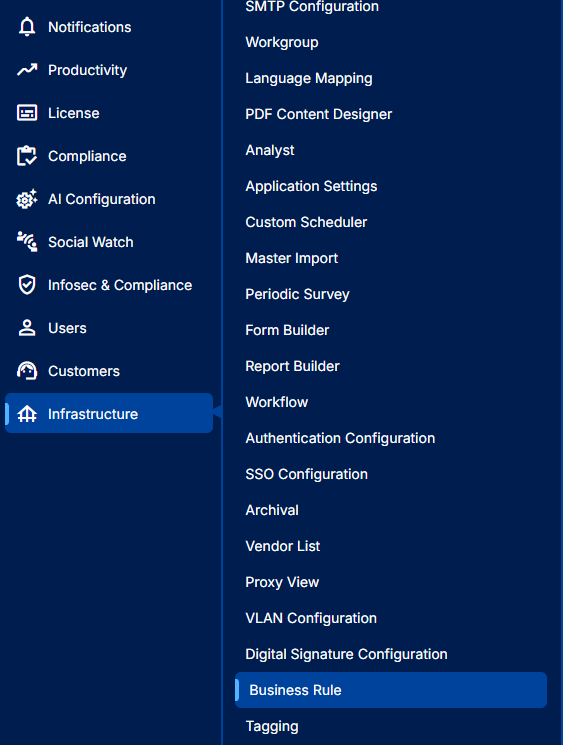
Figure: Infrastructure - Business Rule
The Business Rule page is displayed. Select the Department from the left panel.
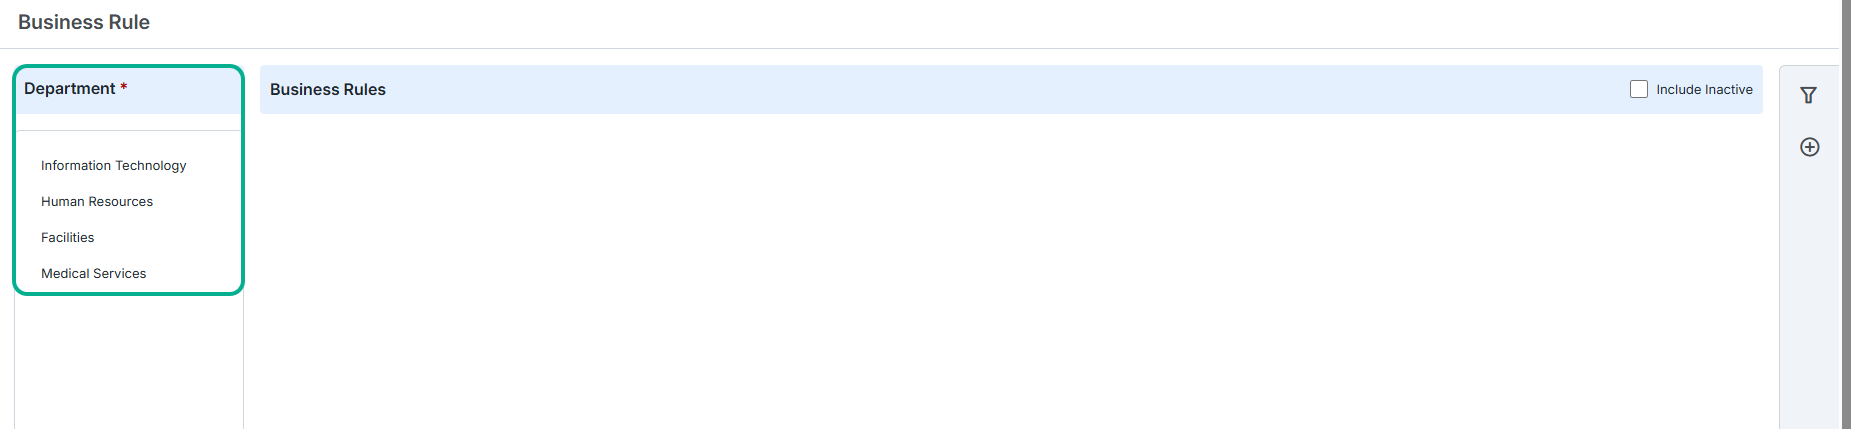
Figure: Department
Select Add New from the right panel to create a new business rule.
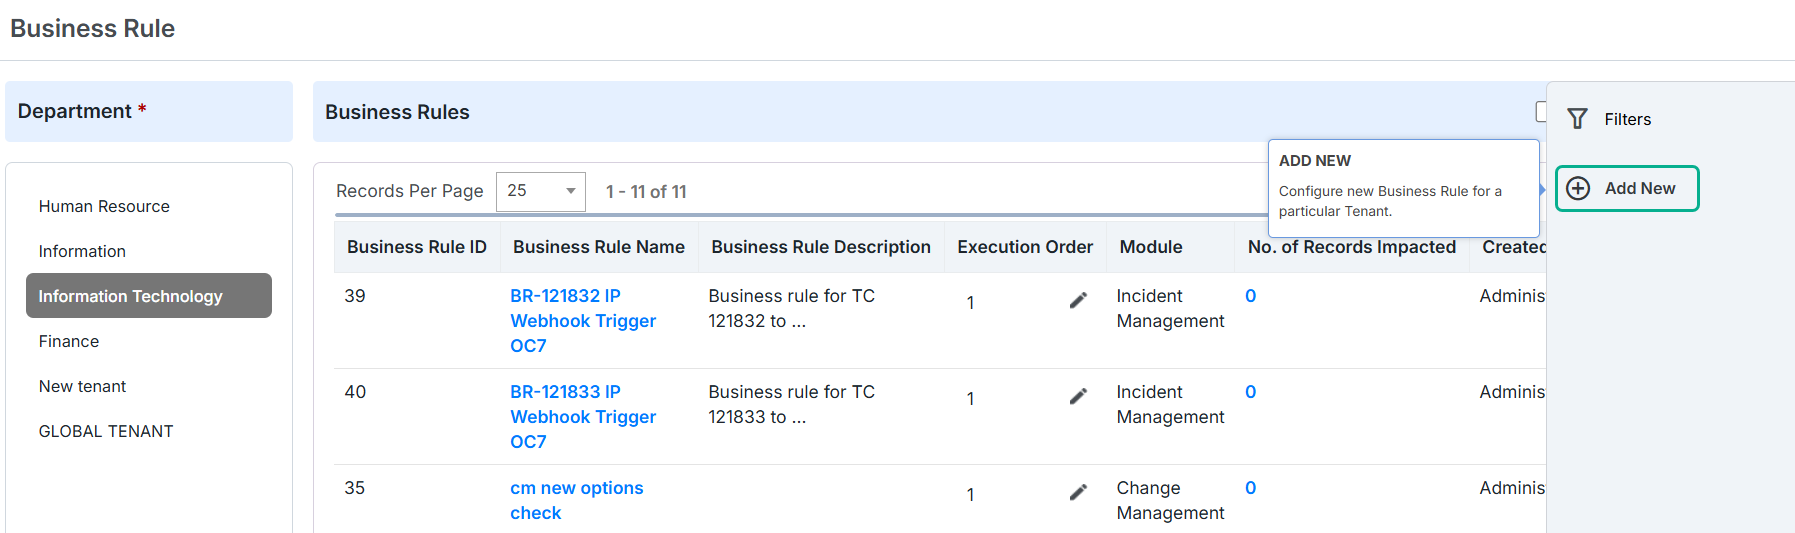
Figure: Business rule – Add New
Fill in the details for the Rule Definition section as shown in the following screen.
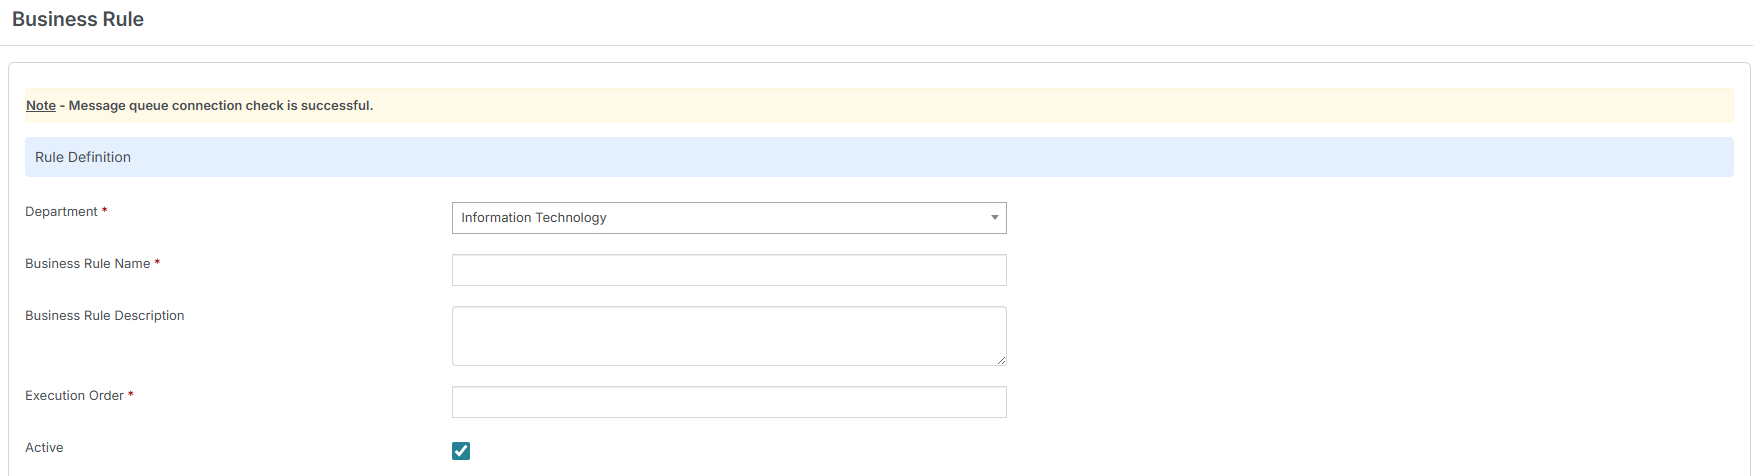
Figure: Rule Definition
The below table describes the fields in the Rule Definition of the Business Rule Designer.
Field | Description |
|---|---|
Department | Select one or more Tenants from the drop-down list. |
Business Rule Name | Enter the name to be given to the Business Rule. |
Business Rule Description | Enter a description about what the business rule will accomplish. |
Execution Order | Enter a numeric value representing the order in which the rule should be executed. Business Rules are executed based on their configured Execution Order. A higher execution order takes higher priority. For example, a rule with an execution order of 1000 runs before a rule with an execution order of 500. If multiple Business Rules have the same execution order, the most recently created rule takes priority. The system allows multiple Business Rules to have the same execution order. |
Active | Enable the Active check box to make the Business Rule active. |
Select the Change Management from the Module dropdown.
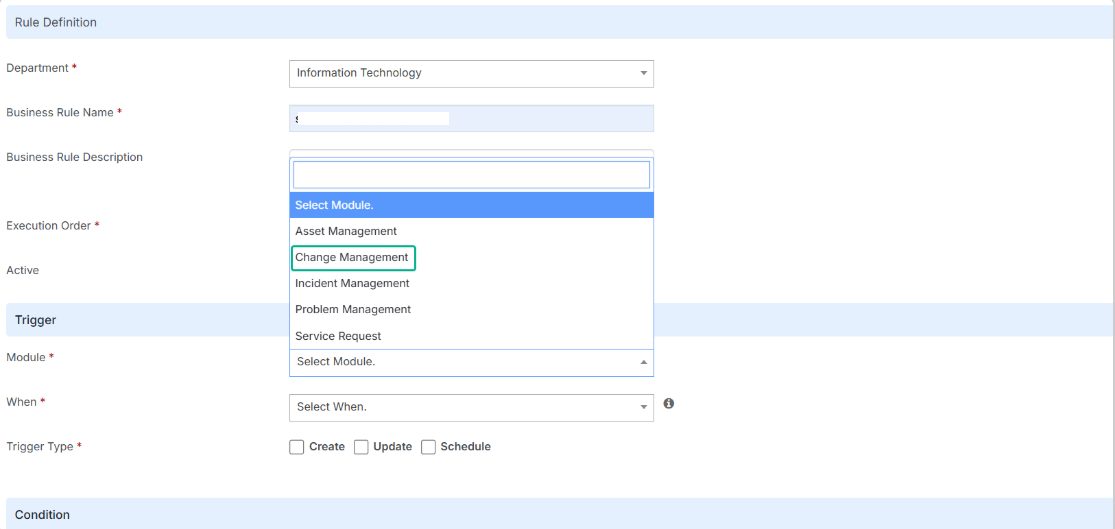
Figure: Module Selection
Choose when to execute the Business Rule.

Figure: Execution Mode Selection
After and Async Business Rules
After Business Rule
Use an After Business Rule in Change Management when a field or related record must be updated immediately after the change record is submitted, and the results must be visible to the user right away.
When a Change record is created or updated, the After rule executes after the data is saved to the database. During this time, the Change record is temporarily frozen, and no additional updates are allowed until the rule finishes processing.
This mode suits actions that must occur before the user continues working, ensuring accuracy and consistency in the Change Records data.
Async Business Rule
The Async Business Rule runs asynchronously in the background and does not freeze the Change record. Users can continue working—adding work notes, updating Change details, and linking related records—while the background processing continues independently.
This mode is ideal for non‑urgent or backend operations such as updating related tables, recalculating downstream fields, synchronizing CI data, linking multiple incidents to a CR, or sending notifications.
Async rules minimize user wait time because the work happens behind the scenes.
Example Use Cases
Scenario 1 — Automatically Escalating High-Risk Changes — After
Context:
A Change Analyst submits a Change to modify a critical production server. During assessment, the Change meets the organization's criteria for a High-Risk Change.
Scenario:
An After Business Rule automatically updates the Change's risk classification and triggers the configured escalation when the defined high-risk conditions are met.
What Happens:
The Change is submitted with the required risk-related information.
The After Business Rule evaluates the configured conditions.
The Change is classified according to the applicable risk criteria.
The configured escalation or routing action is triggered immediately.
Why After:
Because the risk classification needs to be established as soon as the Change is submitted, ensuring the Change follows the appropriate review path.
Scenario 2 — Closing Related Incidents After Successful Implementation — Async
Context:
A Change is created to permanently resolve an issue affecting multiple users. Several Incidents are linked to the Change.
Scenario:
After the Change reaches “Implemented” or “Closed,” an Async Business Rule updates the linked Incidents according to the configured business logic.
What Happens:
The Change reaches the configured status.
The Async Business Rule identifies the related Incidents.
The configured updates are applied to the related records.
The Change remains available while the related-record processing happens in the background.
Why Async:
Updating multiple related Incidents can be a time-consuming backend operation and does not need to prevent the Change user from continuing their work.
Select the trigger type from the dropdown.

Figure: Trigger Selection
Trigger Types
The following trigger types are supported for Change Management:
Create: Select this check box to execute the business rule when a record is created.
Update: Select this check box to execute the business rule when a record is updated.
Schedule: Select this check box to execute the business rule when a record is scheduled.
Note:
If Schedule check box is selected, then When must be selected as Async.
Calendar icon is displayed if the schedule job is configured for this business rule.
Scheduled Business Rules
Business Rules configured with the Schedule trigger execute automatically at defined intervals.
This can be used for scenarios such as:
Sending notifications
Auto-updating Change Records
Monitoring records based on SLA or timelines
Administrators can also define whether the rule should execute:
Anytime
Only during business hours
Only outside business hours
Note:
Scheduled Business Rules are useful for automating periodic Change lifecycle activities such as review and closure.
Choose the conditions based on which the rule executes.

Figure: Condition
Condition
A condition is made up of a field, an operator, and a value. You can formulate complex conditions for rules that include several conditions by utilizing logical operators such as AND or OR operators.
You can use the condition builder to determine when the Business Rule actions should be executed. When a request arrives, there are two options the user can select:
Conditions based on criteria: Select this radio button to specify the conditions based on which the action would be executed.
No Condition: Select this radio button if there are no conditions.
Grouping of Conditions
When there are multiple conditions which need to be computed together, these conditions can be grouped together in a Business Rule. This can be achieved by using the AND/OR conditions and by using the grouping functionality provided in the tool.
Here is an example scenario which shows how we can use Grouping of Conditions to achieve the best results:
Example:
Scenario:
Fredrick wants to automatically move eligible Change records to the appropriate next status when they meet specific implementation and risk criteria, ensuring that Changes follow the defined lifecycle without unnecessary manual intervention.
Solution
Trigger
Module: Change Management
Trigger Type: Schedule
Condition
Status = Implemented
AND Priority = Low
AND Change Type = Normal
OR (Change Type = Emergency AND Risk = Medium)
Action
Update field Status = Closed
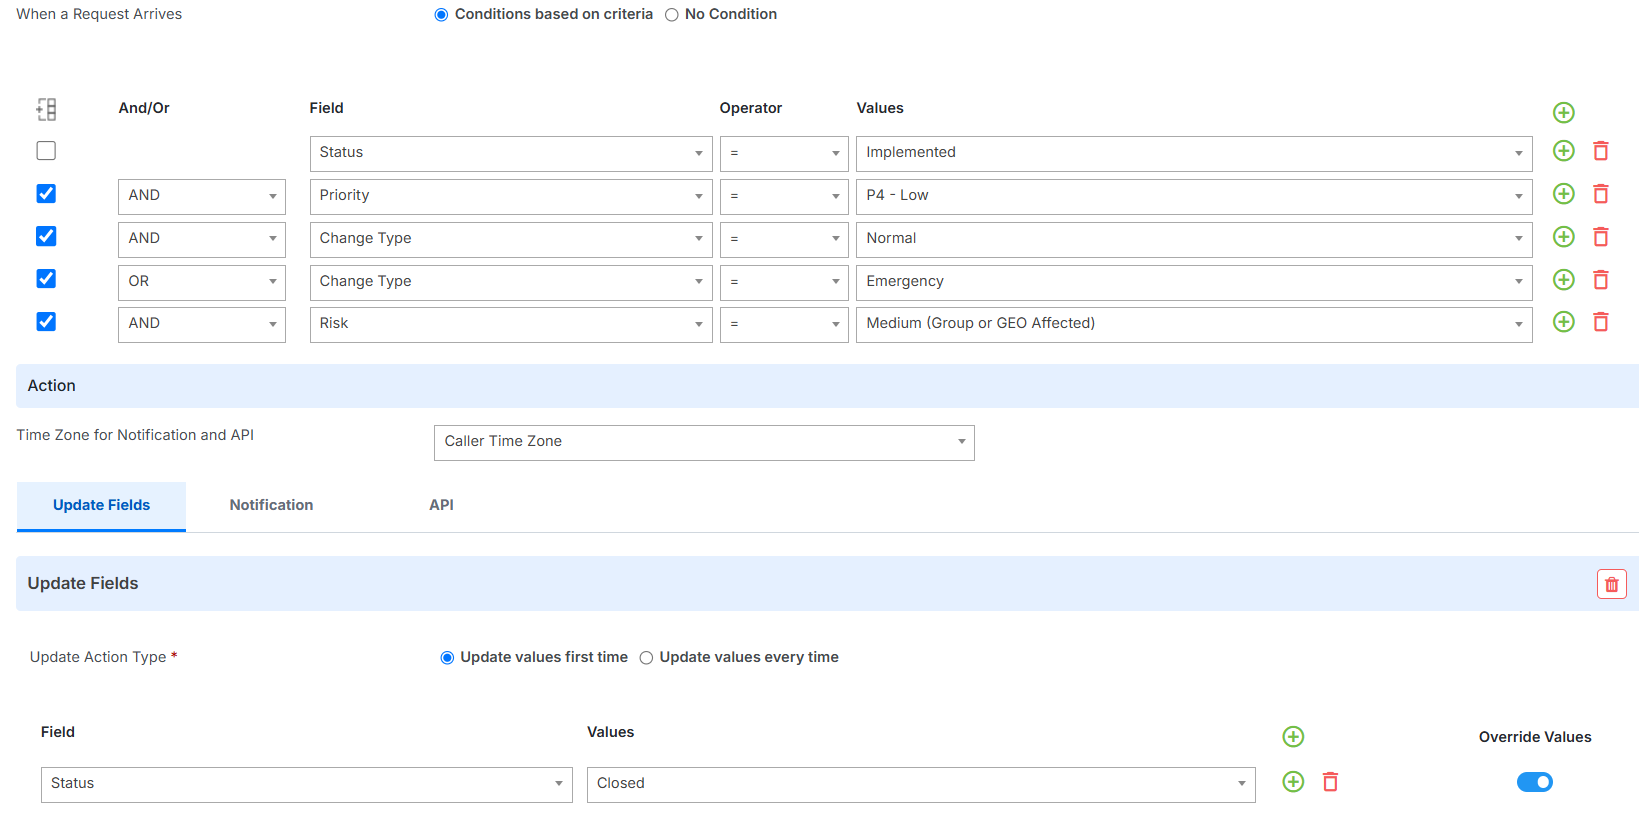
Figure: Example of grouped condition
Fields
Based on the selected module, the fields related to the module are populated in the drop-down list from which you can select the required option. The supported Fields and Field types are as listed below:
Actions
An Action is performed automatically once the condition is met. You can define a Business Rule with only action and no condition or with both. Business Rule Actions are a configurable way to:
Update Fields
Notification
API
Update Fields
The Update Fields section allows you to update any of the supported fields. Once you select the Field from the dropdown, the Value field will appear based on the field selected.
To Update a Field, perform the following steps:
1. Select the Update Fields option.
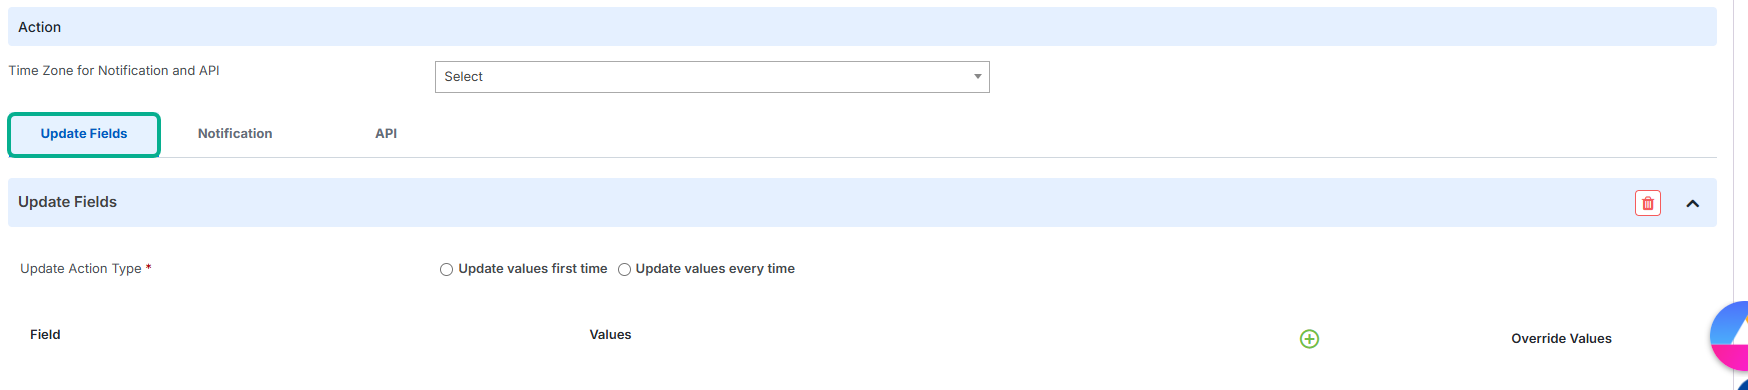
Figure: Update Fields
2. Under Update Action Type, select the update action mode.

Figure: Update Action Type
Note:
Update values first time: If selected, the field will be updated only first time when the condition and trigger is met.
Update values every time: If selected, the field will be updated every time the condition and trigger is met.
3. Click Add icon to add a condition field and select the Field value from the dropdown.
Figure: Update Action Type
4. Once you select the Field, the Value field will appear as shown.

Figure: Value Field
5. Select the appropriate Value from the dropdown. Note that the only valid status transitions are allowed for Update Action. Refer the Status Transitions for more information.
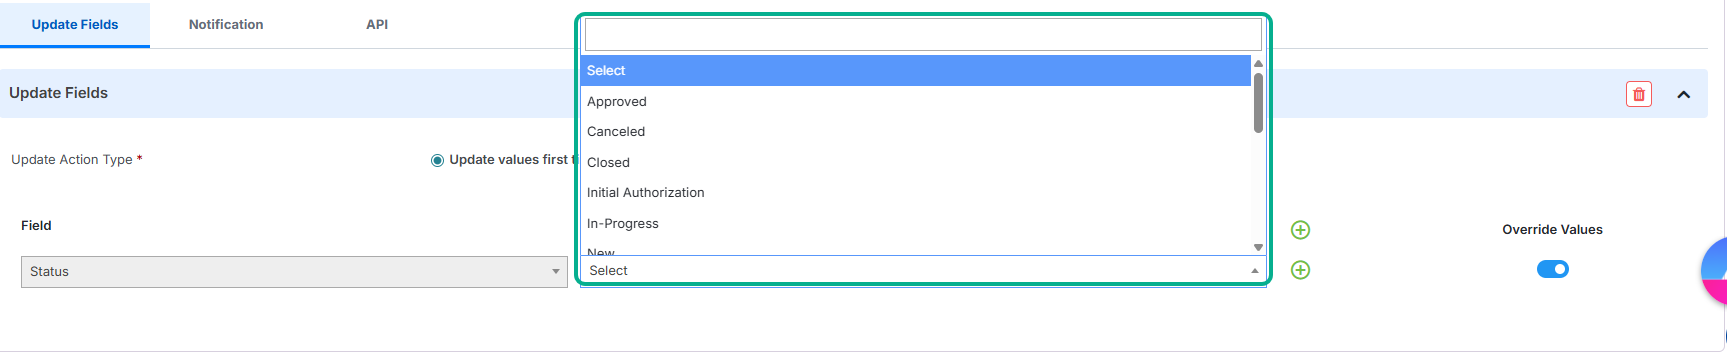
Figure: Select Value Field
. Once done, click Submit.
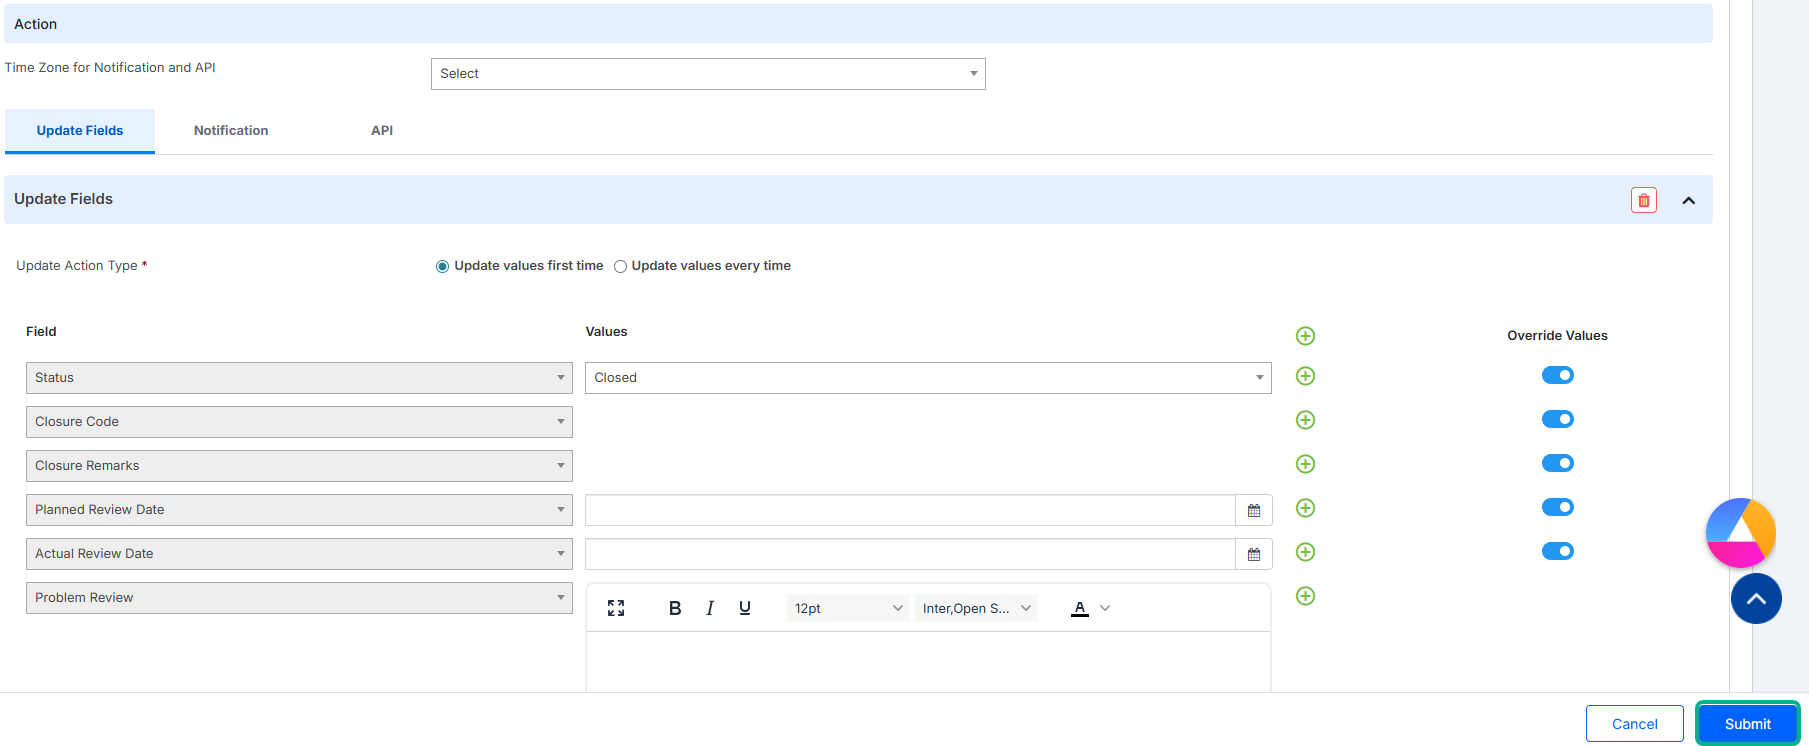
Figure: Submit
Status-Based Update Behavior
When updating the Status field, only valid status transitions are allowed.
Supported Status Transitions are based on the status transition configuration done at Admin level. For more information, refer to Status Transition.
Notifications
Under this tab, you can configure the notifications for the business rule. Business Rules can send notifications to recipients when defined conditions are met.
E- Mail Notification
Email notifications are a way to keep the recipients updated on the progress of your projects through emails.
To create an Email Notification, perform the following steps:
Select Notifications and click Add Notification.

Figure: Add Notifications
The Notification pop-up is displayed. 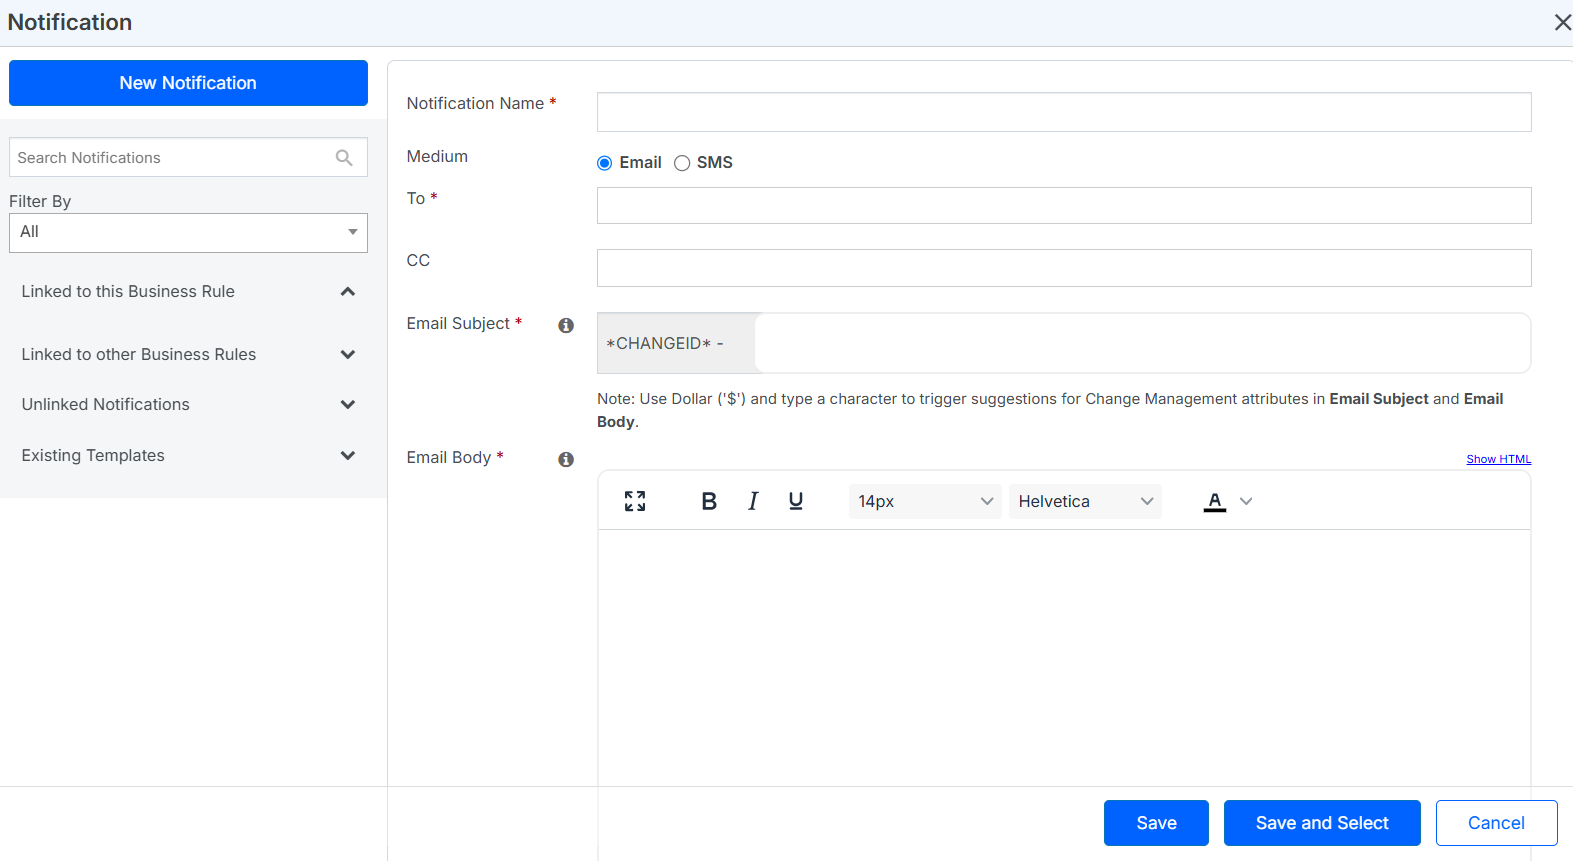
Figure: Notification
Enter the Notification Name and select the notification medium i.e., Email or SMS.
Under the Recipient section, select the recipients.
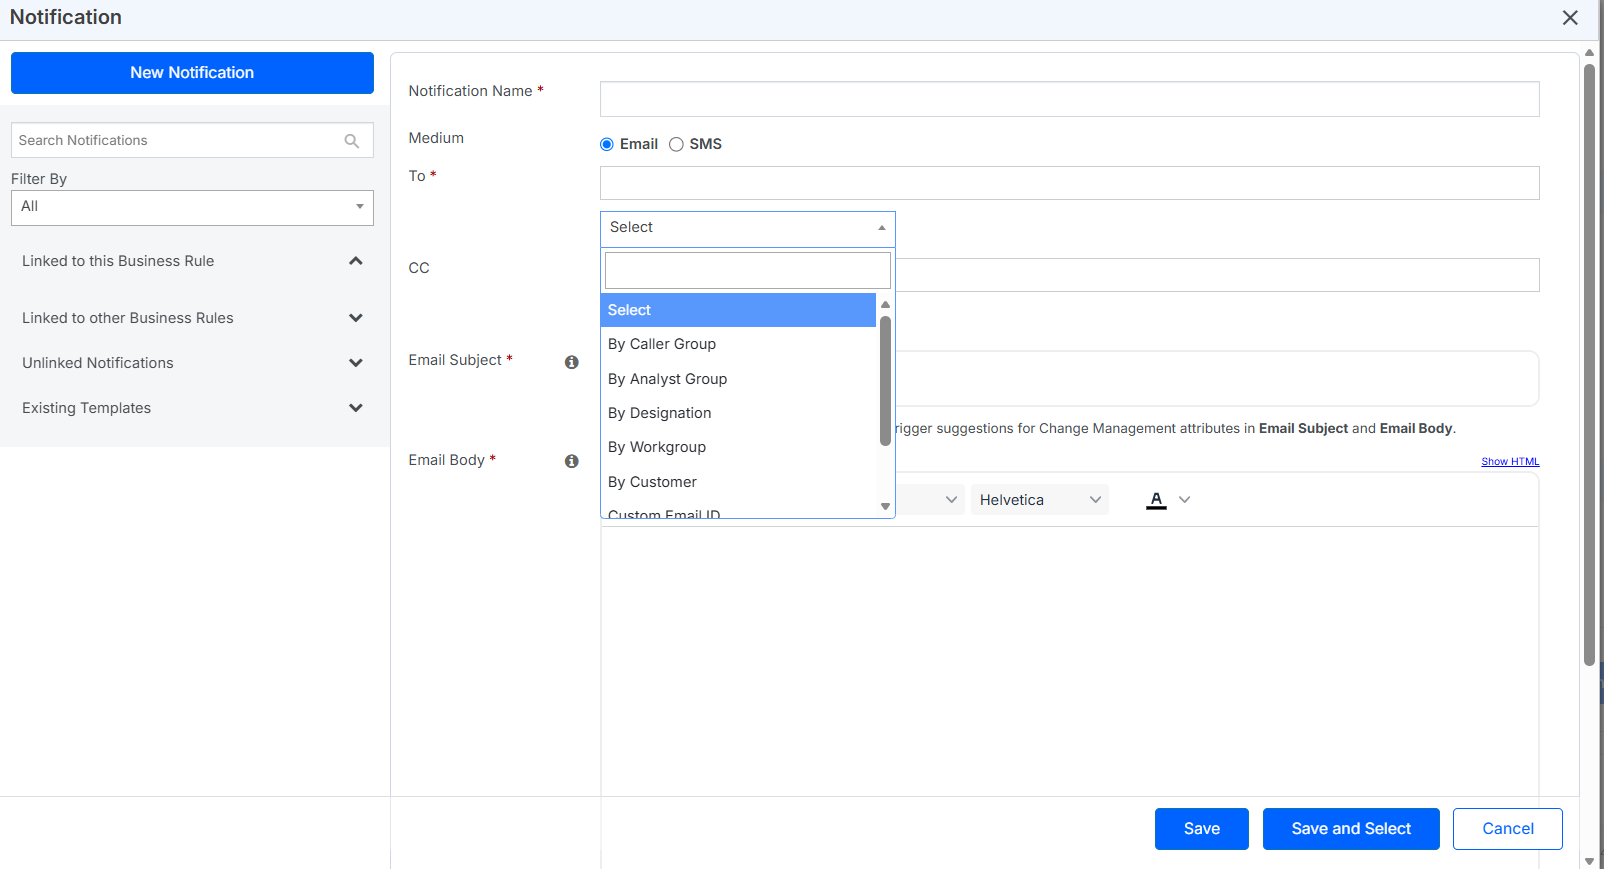
Figure: Recipient Selection
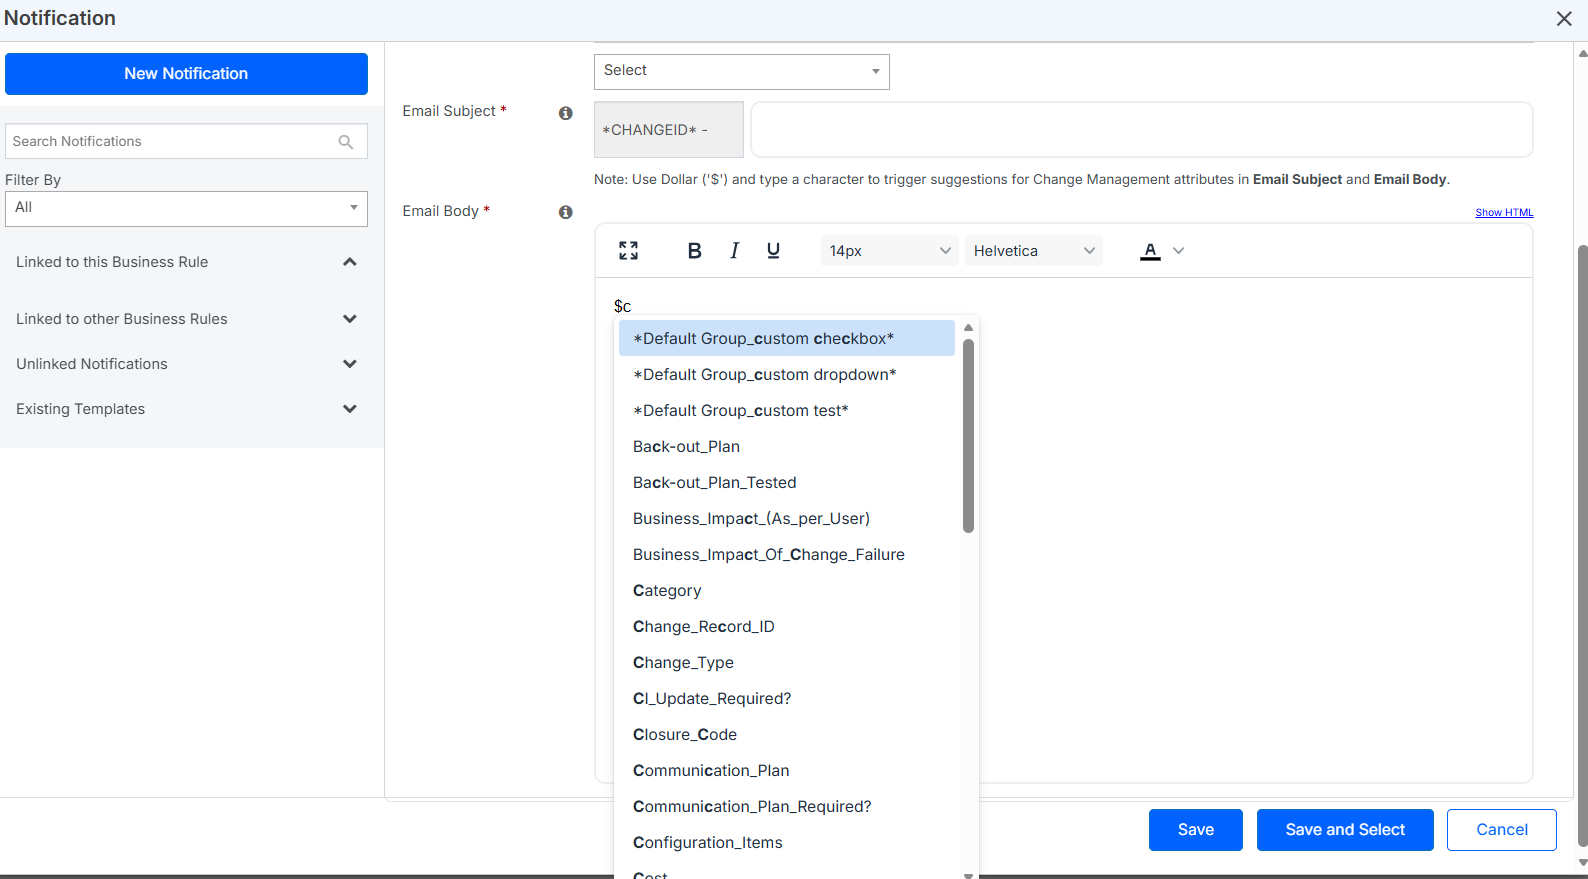
Type in the Email Subject and Email Body as required.
Note:
Use Dollar ('$') and type a character to trigger suggestions for Change Record Attributes.
Screenshot
Figure: Description - Change Record Attributes
Recipients
Understanding and using the recipient section appropriately helps in effectively notifying the stakeholders. The recipient is divided into two sections which are displayed based on the selected medium:
To - The "To" field is used to specify the primary recipients of the notification. These are the individuals or groups that the sender expects to read and respond. Include the main recipients who are directly involved or expected to act.
Cc - The "CC" field is used to include additional recipients who may be interested in the notification content. CC recipients are not the main addressees but are still receiving a copy for information. Inform others or keep them in the loop without making them the primary audience.
You can add the type of recipient based on their groups. The types of recipients are explained in the following table:
Group | Members | Description |
By Caller Group |
|
|
By Analyst Group |
|
|
By Designation | Search and select the required Designations. | By selecting this option, you can search a recipient by searching with the Designation of the required user. |
By Workgroup | Search and select the required Workgroups. | By selecting this option, you can search a recipient by the required Workgroup. |
By Customer | Search and select the required customer | By selecting this option, you can search a customer. |
Custom Email ID | Type in required e-mail id. | You can add the email id of the recipient manually using this option. |
By Custom Attribute | Search and select the required Attribute. | By selecting this option, you can search a recipient by the required custom attribute. |
By Approver | Search and select the required Approver Group. | By selecting this option, you can search a recipient by the required Approver Group.
|
SMS Notification
To create an SMS notification, perform the following steps:
Under the Notifications tab, click Add Notification. The Notification pop-up is displayed.

Figure: Add Notifications
Select Medium as SMS to create SMS notification.

Figure: Medium – SMS
Fill in the required details. For more information, see Field Description.
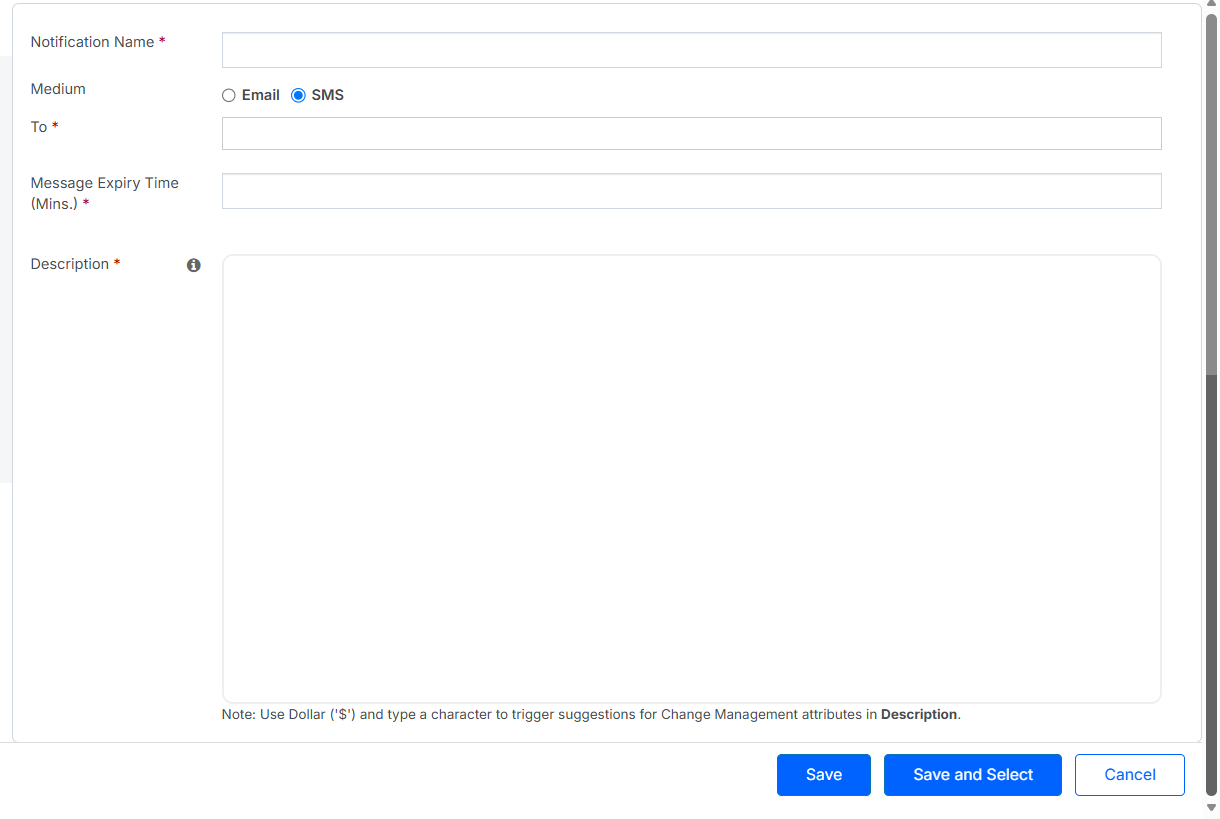
Figure: SMS Configuration
Note:
Use Dollar ('$') and type a character to trigger suggestions for Change Record Attributes in Description.
Click Save. A new SMS Notification is created and displayed under the Unlinked Notifications section.
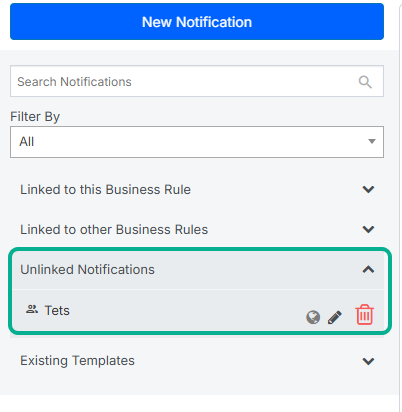
Figure: Unlinked Notification
Note:
Click (Edit) icon to edit the template details as shown above. Click (Delete) icon to delete a template.
Field Description
The following table describes the fields on the Notification pop-up:
Field | Description | ||||||||||||||||
Notification Name | Type in the name for the SMS notification template. | ||||||||||||||||
Medium | Select the medium as SMS to configure SMS notification. | ||||||||||||||||
To | Add the main recipients of the email.
| ||||||||||||||||
Message Expiry Time (Mins.) | Specify the message expiry time in minutes | ||||||||||||||||
Description | Type in the detailed description. |
API Action
API stands for application programming interface. It is a set of protocols and tools that allow the Apex Platform to interact with other third-party applications. This can include anything from retrieving or transferring data to third-party applications, managing or controlling software.
To add API, perform the following steps:
Under the API tab, click ADD API. The API pop-up is displayed.
 Figure: API
Fill in the required details. For more information, see Field Description.
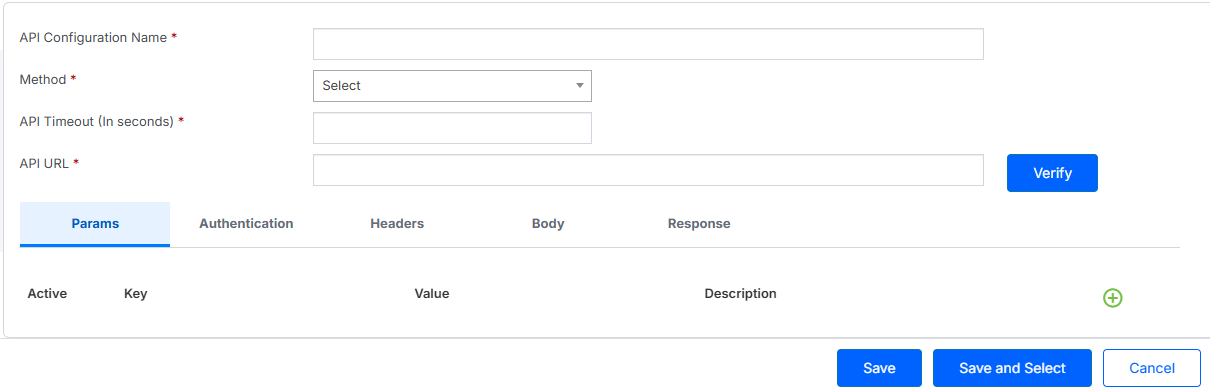
Figure: API Configuration
Click SAVE. A new API is created and displayed under the Unlinked Notifications section.
Field Description
The following table describes the fields on the API pop-up:
Field | Description |
API Configuration Name | Type in the Name for the API Configuration. |
Method | Select the required Method from the drop-down list. The available methods are:
|
API Timeout (In seconds) | Specify the Timeout in seconds |
API URL | Specify the API URL |
Params | You can send path and query parameters with your requests using the Params tab. To send a path and query parameter,
|
Authentication | Authentication involves verifying the identity of the client sending a request, and authorization involves verifying that the client has permission to carry out the endpoint operation. Open the Authorization tab to configure your access details. Select the required Authentication type from the drop-down list. The available types are:
|
Headers | Some APIs require you to send headers along with requests, typically to provide additional metadata about the operation you are performing. You can set these up in the Headers tab. Enter any key-value pairs you need and will send them along with your request. |
Body | The Body tab allows you to specify the data you need to send with a request. |
Response | Under this tab, you can view the API response. |
Linked to this Business Rule
Under this section, you can view the list of APIs linked to this Business Rule. Also, you can edit and delete the APIs available under this section.
Linked to other Business Rule
Under this section, you can view the list of APIs linked to other Business Rules. Also, you can edit and delete the APIs available under this section.
Unlinked APIs
Under this section, you can view the list of unlinked notifications. These notifications are created but not linked with any business rule.
Business Rule Execution Behavior
Execution Order
Business Rules are executed before workflows.
Loop Prevention
Business Rules do not re-trigger within the same session due to workflow updates.
They may trigger again in a new execution cycle if conditions are met.
Note:
This prevents recursive execution between Business Rules and workflows.
Change History
Click Change History on the right-side action panel.
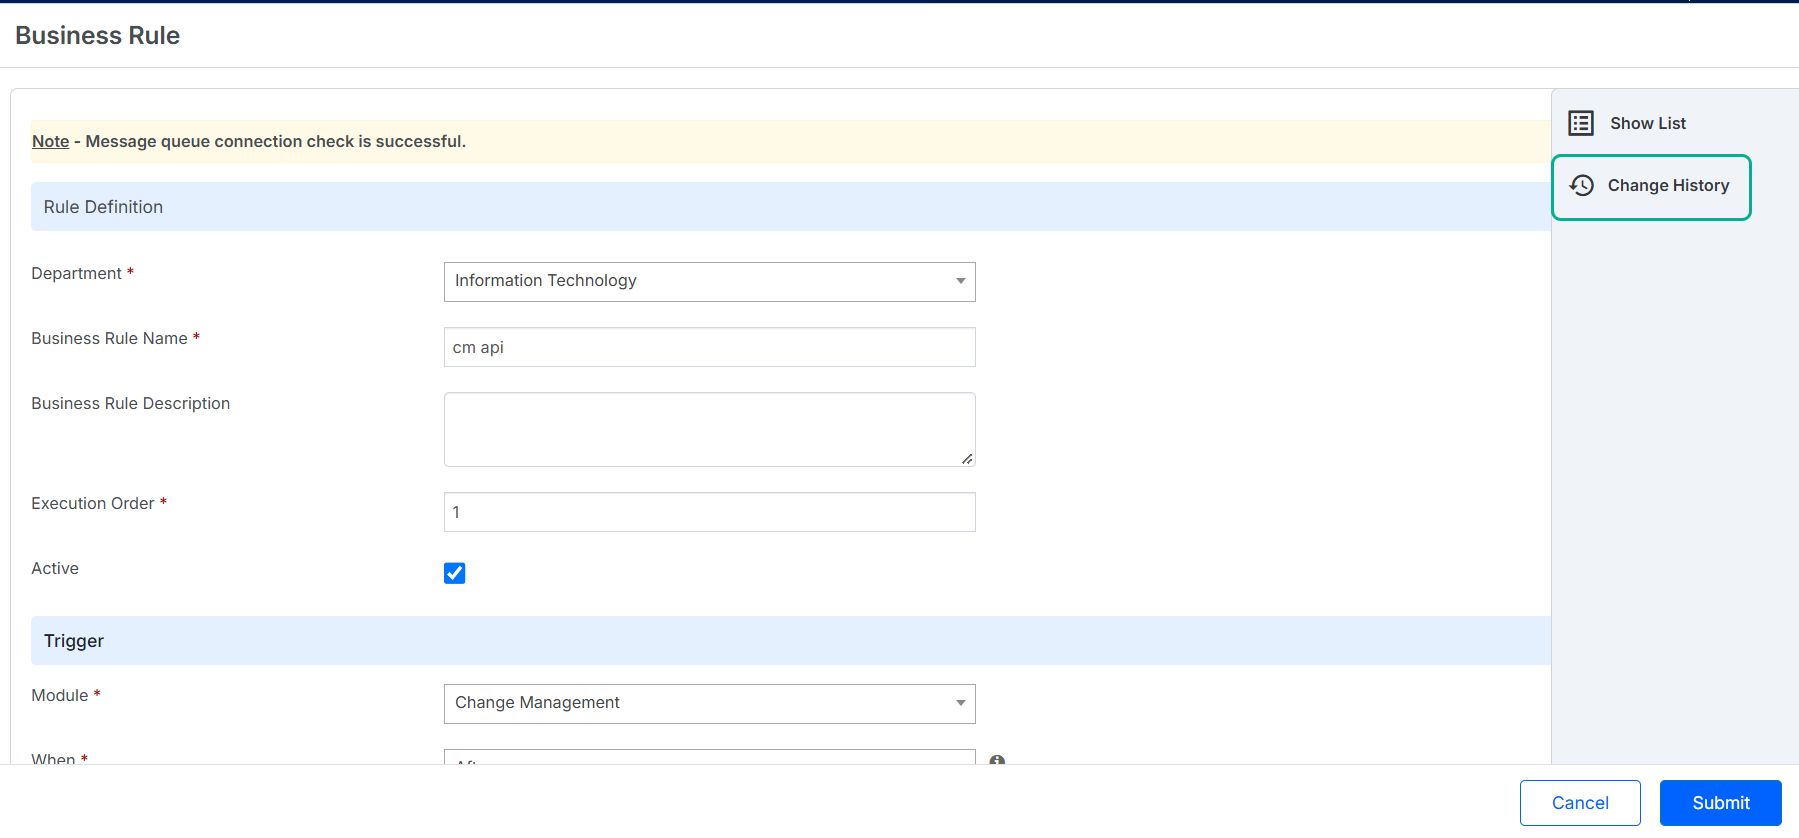
Updates made through the Update Fields action gets recorded in the Change Record's Change History, consistent with manually made updates (for example, “Status changed from New to In Progress”
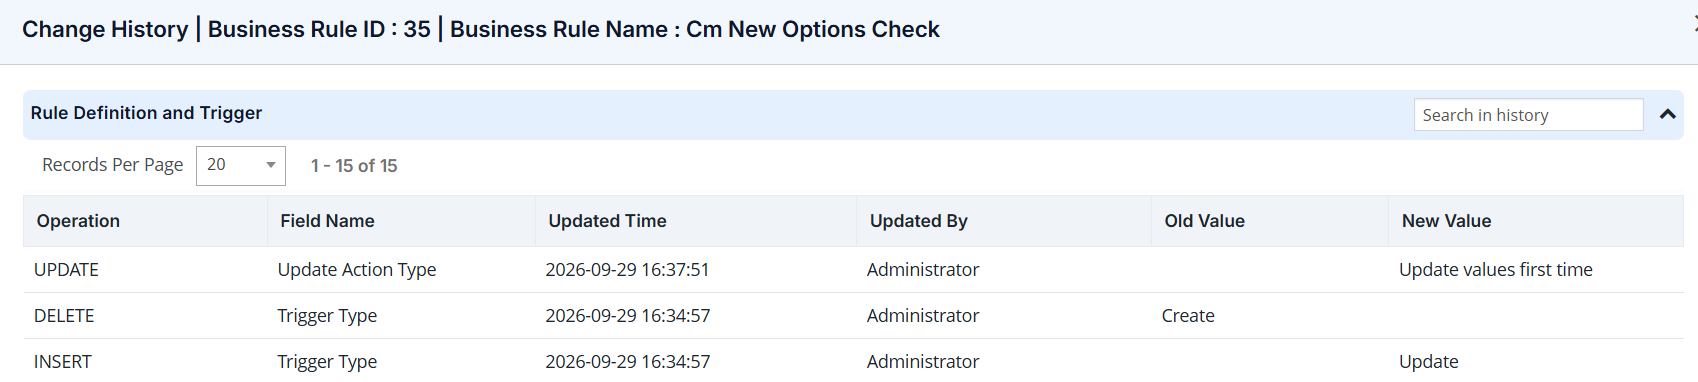
Figure: Change History Details